
You have unlimited access as a PRO member
You are receiving a free preview of 3 lessons
Your free preview as expired - please upgrade to PRO
Contents
Recent Posts

- Object Oriented Programming With TypeScript
- Angular Elements Advanced Techniques
- TypeScript - the Basics
- The Real State of JavaScript 2018
- Cloud Scheduler for Firebase Functions
- Testing Firestore Security Rules With the Emulator
- How to Use Git and Github
- Infinite Virtual Scroll With the Angular CDK
- Build a Group Chat With Firestore
- Async Await Pro Tips
Angular Firebase Authentication Tutorial - OAuth
Episode 3 written by Jeff Delaney
Health Check: This lesson was last reviewed on and tested with these packages:
- Angular v4
- AngularFire2 v4
Update Notes: Breaking changes have been introduced since this video's original release. Checkout the following updated lesson Episode 55 Firebase OAuth with Firestore.
Find an issue? Let's fix it
What was once a complex task in web development, OAuth becomes almost trivial with Angular and Firebase. This is a three part series, I will go into depth on how to implement each of the three different user auth paradigms offered by firebase - social (OAuth), anonymous, and email/password.
In part one, I show you how to build the OAuth feature in the Angular Firestarter Demo App.
OAuth
Surprisingly, authorizing users via their social account is the easiest to implement. This has not always been the case, as a Rails developer I remember spending hours coding and testing OAuth into web apps. At this point, Firebase is integrated with Google, Facebook, Github, and Twitter. That’s flexible enough for most cases, but could be a problem if you really want another provider, say BitBucket, VK, or MySpace. In that case, you may want to bypass Firebase Auth and go with something Auth0.
App Structure
We are going to keep this super simple.
- Auth Service. Handles all interaction with Firebase API.
- UserLogin Component. Social auth login buttons / or logout
- UserProfile Component. Shows user details or guest.
Step 1: Activate OAuth Providers in Firebase
Google works out of the box. Click the button and you’re done.
For the Github, Facebook, and Twitter you will need to get credentials from developer account for each service.
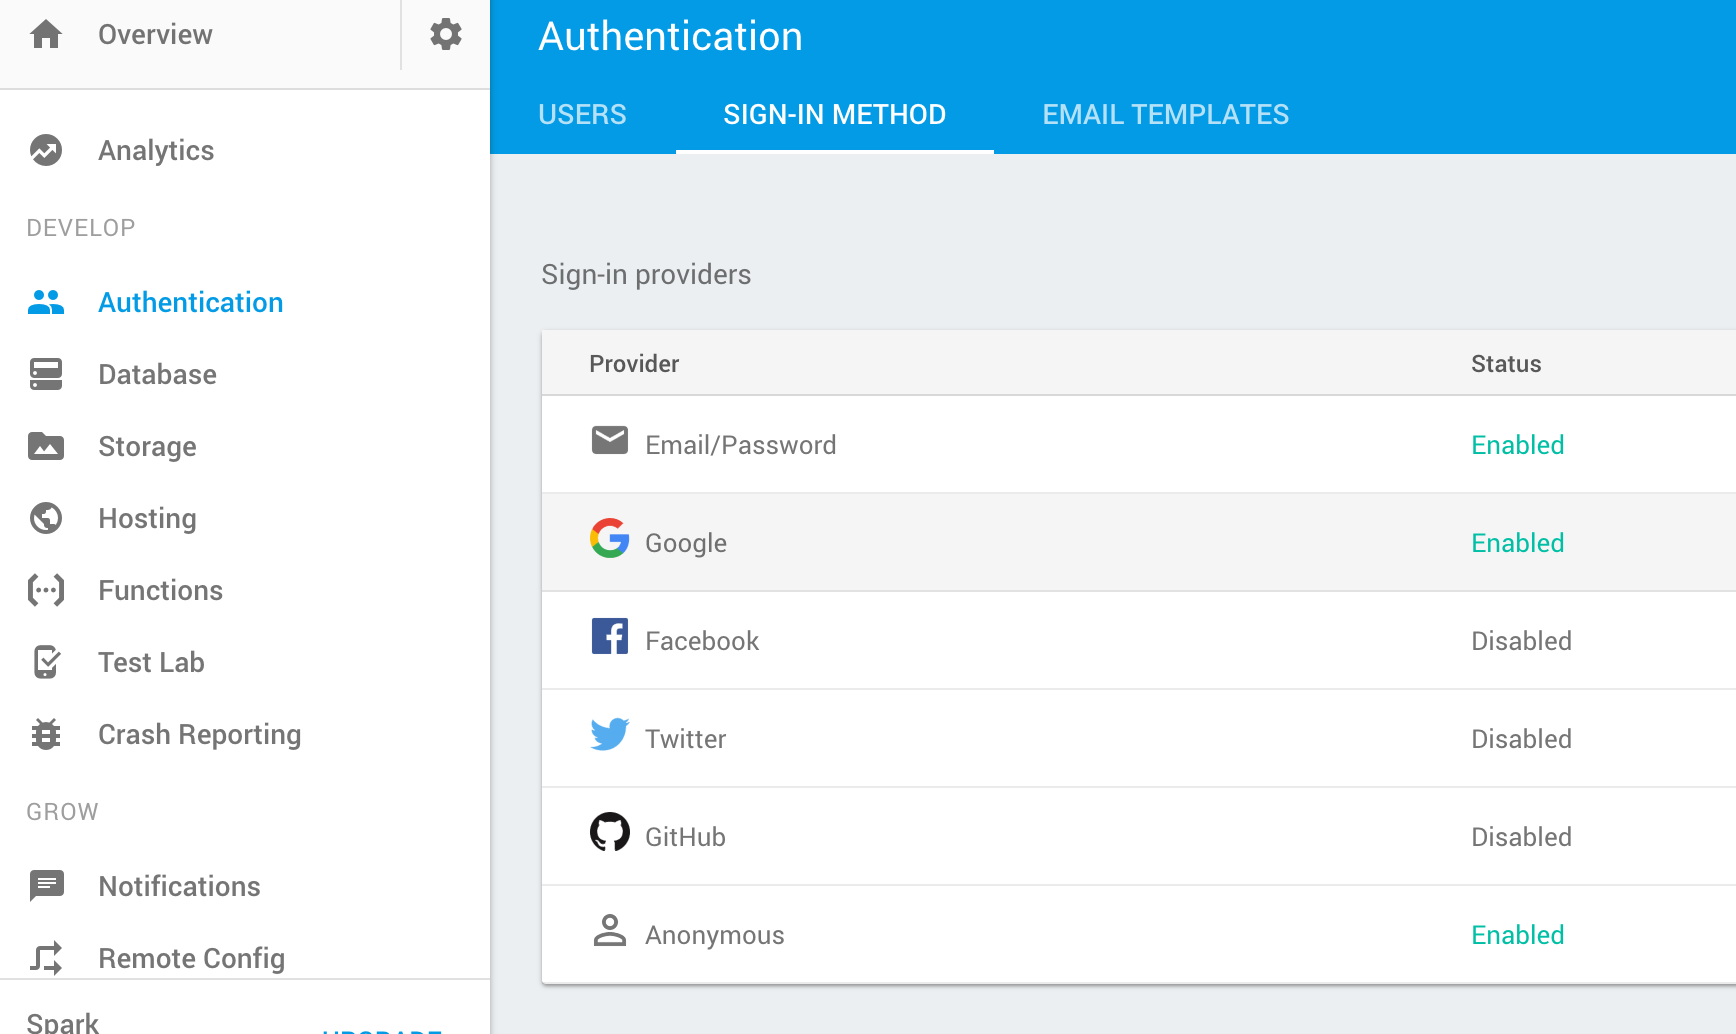 Make sure to active the social providers you want to use in Firebase.
Step 2: Generating Components and Bootstrapping
This tutorial uses AngularFire, so make sure it’s installed or clone our firestarter demo app from github. Next, let’s generate the skeleton files using angular cli.
ng g service core/auth |
Don’t forget to add the AuthService to the providers list in app module.
app.module.ts
import { AuthService } from './core/auth.service'; |
Step 3: Creating a Service for the Backend
The AuthService does most of the heavy lifting and is the glue between your app users and Firebase. I prefer to keep auth logic in the app/core/ directory, but you can put it wherever you’d like. First, we need to import the AngularFire modules and the Router.
import { Injectable } from '@angular/core'; |
Observing the FirebaseAuthState
This is single most important step in this tutorial. The way you handle auth with Firebase is by subscribing to the AngularFire.auth observable which returns a FirebaseAuthState object.
When the user is logged out, this FirebaseAuthState is null. When logged in, the object is filled with all sorts of useful stuff like the User ID (UID), Display Name, Photo URL, are more. Here’s how to subscribe to it.
core/auth.service.ts
() |
Creating getters to make life easier
TypeScript uses accessors (i.e getters and setters), which make functions behave more like object attributes. If you’re familiar with Object Oriented Programming, this should make you happy because accessors give you more control over the member attributes for class.
In many cases, we only need to know if a user is logged in or not. I am using a ternary operator that returns true only if the auth object is present.
// Returns true if user is logged in |
Here’s a couple more convenience functions that will help keep your template code nice and clean in the future.
// Returns current user |
Social Sign In
Here’s the beauty of Firebase - you can wire up 4 social auth providers with almost zero code. I start by creating a reusable private function that takes the provider as an argument.
When a user attempts to sign in two things can happen - success or failure. If it’s a success, the then code will execute, if its’s an error the catch code will execute.
private socialSignIn(provider: number): firebase.Promise<FirebaseAuthState> { |
You may be wondering what the updateUserData function is about. It’s optional, but you may want to save your user records the firebase realtime database. It can be useful if you plan on iterating over users in your app or if you collection custom data on users. It’s can also be setup as a resuable function.
private updateUserData(): void { |
Now we just need an action for each of the four providers. This is as simple as returning the result of the socialSignIn function.
githubLogin(): firebase.Promise<FirebaseAuthState> { |
Sign Out
Lastly, we just need a sign out function to reset the FirebaseAuthState when the user signs out. It’s also dead simple.
signOut(): void { |
That’s it for the service code. Now it’s time to make it available to the user on the front-end Angular components.
Step 4: User Login Component
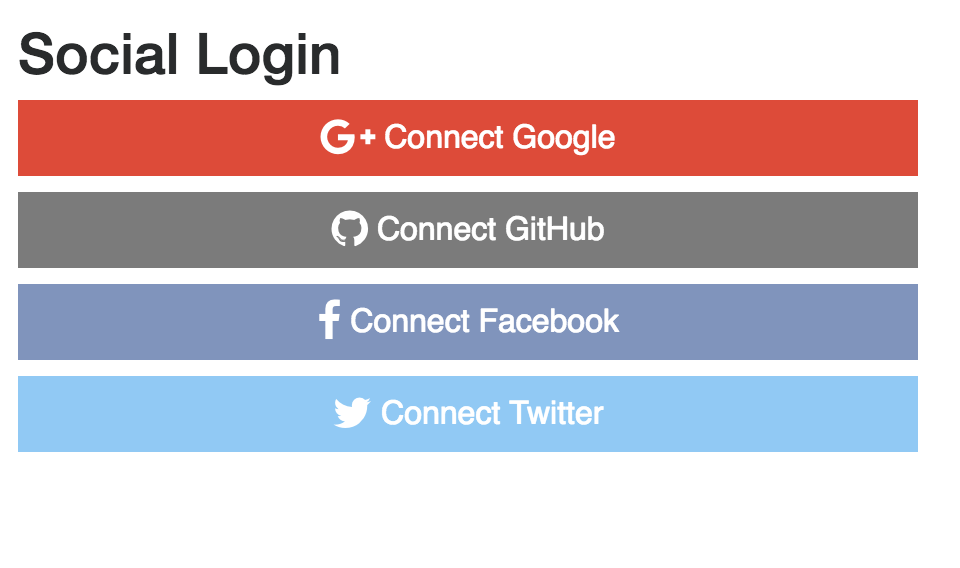
A couple of social auth buttons should do the trick. I am using this custom SCSS on top of bootstrap 4 for the buttons.
Injecting the Service
The first step is to inject the auth service into the component. This will give us access to the accessor functions to see if the user is logged in or not. Obviously, we don’t want to display the login buttons if the user is already logged in.
users/user-login.component.ts
import { AuthService } from "../../core/auth.service"; |
In the component, we are going to create a separate method for each provider. Just like in the service, we will add a reusable function called afterSignIn that will execute after the service finishes logging in the user. For now, we will just have the router to redirect the user to the home page.
private afterSignIn(): void { |
Now when can use this method for each of the four providers, rather than duplicate it each time. You can also chain the .catch() function if you want to handle errors from the component.
signInWithGithub(): void { |
users/user-login.component.html
Because the signIn functions are defined in our component’s TypeScript, we can bind them to the template. Since we’re dealing with buttons, we will just fire them on the click event.
Also notice, we are using the getters from the auth service to conditionally display content based on whether or not the user is authenticated. I am using the if-else syntax introduced in Angular 4.0.
<div *ngIf="!auth.currentUser; else alreadyLoggedIn"> |
Step 5: User Profile Component
You may or may not need a user profile, but it can be created with the basic information from the auth provider. In this case, the profile is going to use the name and photo url from the Firebase auth object to display a user avatar, and also provide a logout option. All we need the auth service injected and a function for the logout action.
users/user-profile.component.ts
constructor(public auth: AuthService) { } |
In the template, it we use the same type of conditional logic to display information based on the data authenticated state and information available from the auth object.
users/user-profile.component.html
<!-- User logged in --> |
Potential Gothca with Multiple Accounts
Let’s say you have a user that originally authenticated with Google, then logs out, and comes back trying to log in with Facebook. Firebase is going to throw an error. Just something to keep in mind if you use multiple providers. You may need to catch the error and prompt the user to login with a different provider. Depending on your auth setup, you many need to debug any number of error situates were are defined in the firebase documentation.