
You have unlimited access as a PRO member
You are receiving a free preview of 3 lessons
Your free preview as expired - please upgrade to PRO
Contents
Recent Posts

- Object Oriented Programming With TypeScript
- Angular Elements Advanced Techniques
- TypeScript - the Basics
- The Real State of JavaScript 2018
- Cloud Scheduler for Firebase Functions
- Testing Firestore Security Rules With the Emulator
- How to Use Git and Github
- Infinite Virtual Scroll With the Angular CDK
- Build a Group Chat With Firestore
- Async Await Pro Tips
Coinbase OAuth With Firebase - Build Bitcoin Apps
Episode 77 written by Jeff Delaney
Bitcoin is the hottest topic in the tech world as we approach 2018. Although it’s price is obviously a bubble, blockchain technology is a game-changer and presents a great opportunity for developers who want to build apps around crypto currencies. In this lesson, I will give you a foundation for building Bitcoin apps by integrating Firebase Auth with the Coinbase OAuth2 API.
This tutorial will teach you two main concepts.
- Coinbase OAuth2 Integration with Firebase
- Allow users to securely retrieve their Bitcoin wallets (or Ethereum and Litecoin)
Although I use Angular for the frontend, all of the heavy lifting occurs in the backend NodeJS Cloud Function environment, so all the backend code can be used for any client side framework.
Full source code for the Firebase Coinbase.
Are you Bitcoin rich?
Consider donating some bitcoin to AngularFirebase to keep the content free and frequent.

AngularFirebase Bitcoin Address: 13pEjpLf3taeezGkLpn2CMi2YNxaBF7rVZ
Initial Setup
This lesson has quite a few moving parts, so make sure to follow each step carefully.
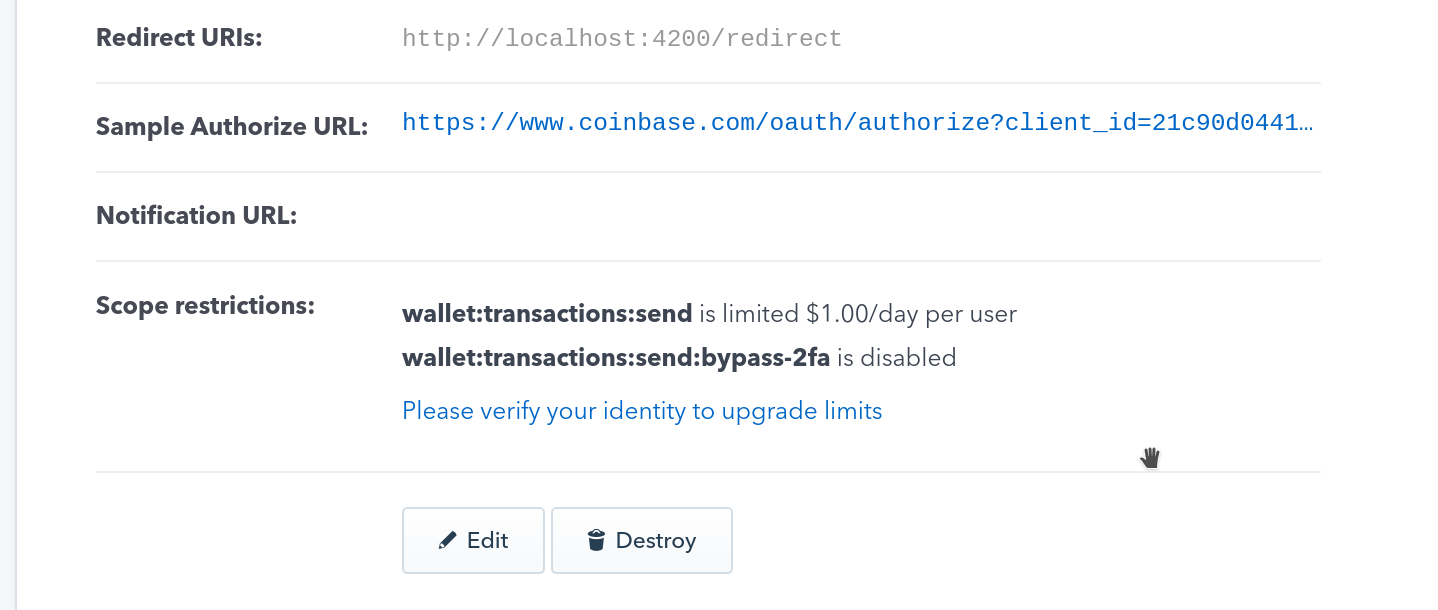
Coinbase App Setup
Signup for Coinbase and generate a new app. The app contains the your API keys and allows you to configure an OAuth redirect URI. For this demo, the redirect URI is localhost:4200, which is the default port for Angular.
Angular CLI App
The Angular app is nothing fancy. We just create a basic CLI app with routing:
ng new bitcoinApp --routing |
Then generate a few resources that we will build out later in this lesson.
ng g component user-details |
After that, you will need to install AngularFire by following the instructions on the official repo. The app will also import Angular’s HttpClient. Your app module should look something like this:
// ... omitted default imports |
Cloud Functions Setup
We’re going to make heavy use of async functions, which provide syntactic sugar for Promises. TypeScript must be used for this code to work because Firebase uses Node v6. If migrating an existing project, you can follow the TypesScript Cloud Functions guide.
npm install firebase-tools -g |
Rather then use Node’s built-in HTTP client, I am replacing it with Axios, which is Promise-based. It is going to make our life way easier when we start dealing async functions. We will also need crypto and cors installed as well.
Also install the types for these packages to get the IDE awesomeness of TypeScript.
npm install axios --save |
Now, we need Coinbase API credentials saved to the functions environment.
firebase functions:config:set coinbase.id="YOUR ID" coinbase.secret="YOUR SECRET" |
Custom OAuth providers like Coinbase must mint their own Firebase Auth Token, so it’s necessary to use the our full service account, rather than the default functions admin config.
Download the service account and save it inside the functions directory.
Here’s what all of our default imports look like in index.ts.
import * as functions from 'firebase-functions'; |
The service account holds sensitive API keys - make sure to keep it out of any clientside code and add it to your .gitignore file.
Coinbase OAuth with Firebase
We have two Firebase Cloud Functions that operate as the middle-men between Angular and Coinbase. Here’s a breakdown of how it works step-by-step:
- Angular creates a popup that points to the
redirectCloud Function. - Cloud Function redirects to Coinbase with our app credentials.
- User logs into their Coinbase account, Coinbase redirects to Angular with an auth code.
- Angular sends the auth code to the
tokenCloud Function - The Cloud Function mints a custom user and sends it in the response.
- AngularFire authenticates the user in our app.
Piece of cake.
You’re going to see a few different URLs being thrown around, so let me explain those for you now.
angularApp- Angular, orlocalhost:4200locallycloudFunction- Cloud Function Endpoint, orlocalhost:5000locallycoinbase.com/oauth- Coinbase OAuth.api.coinbase.com- Main Coinbase API.
Redirect Cloud Function
The redirect function is the easy one. It’s just serves as a proxy for our API credentials and securely directs the user to Coinbase to log into their account.
export const redirect = functions.https.onRequest((req, res) => { |
Token Cloud Function
The token Cloud Function receives the auth code form Coinbase, which is then sent back to Coinbase from the server to generate an access token and refresh token - in other words, the user is logged in as a Coinbase user on our server.
We use the token to get their user ID from the Coinbase API, then mint a custom auth token for Firebase. This token is passed back to Angular where it can be used to log the user into our firebase-powered app.
// Use the code returned from Coinbase to mint a custom auth token in Firebase |
And now for our first async functions. Let’s describe the mintAuthToken step-by-step.
- Use the
codeto authenticate the user. - Get the user account details from coinbase (including the user ID).
- Generate a custom UID that looks like
coinbase:coinbase-id-xzyand mint it. - Save the coinbase tokens to the Realtime DB.
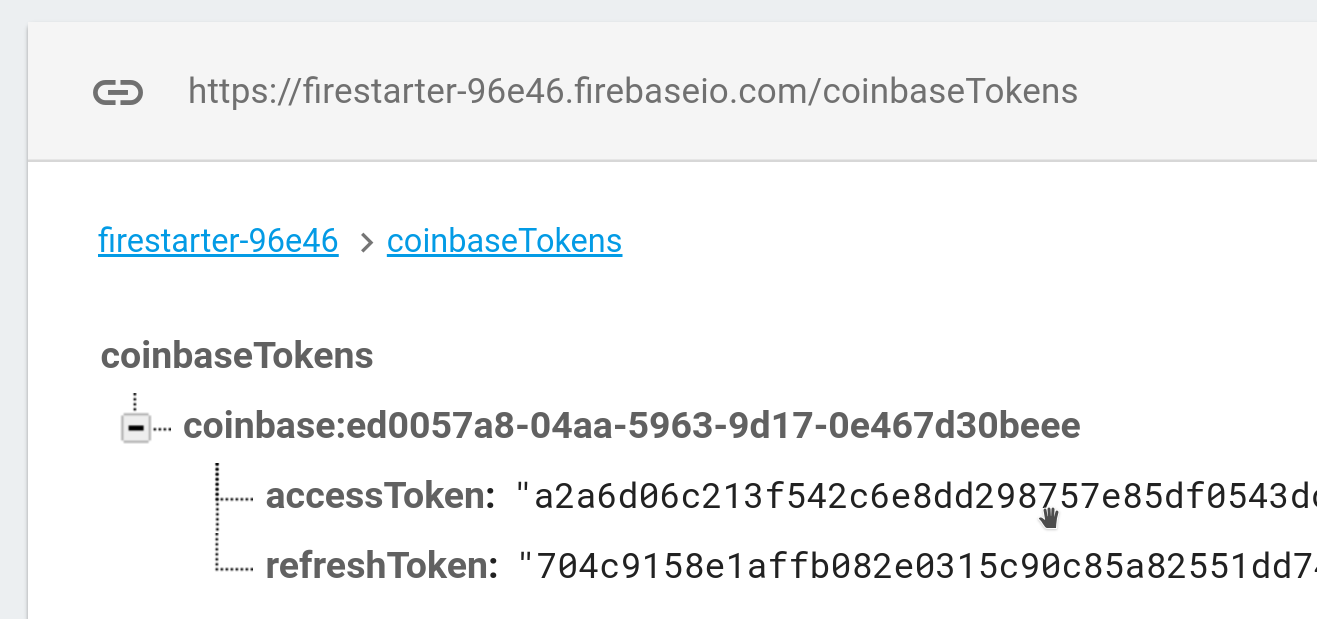
Note about step 4. Coinbase uses refresh tokens, which are used to regenerate a valid access token (they expire every 2 hours). After the user authenticates, you will want to save these in the database to make API calls on the user’s behalf. Make sure to block read/write access to coinbase tokens in your database rules and only access them via the backend.
async function mintAuthToken(req): Promise<string> { |
Wallet Cloud Function
What good would Coinbase auth be without the ability to make requests to the API to view and send crypto currency payments? Let’s write another function that retrieves a user’s wallet details, including its current bitcoin balance.
export const wallet = functions.https.onRequest((req, res) => { |
Again, let’s break this down step-by-step. This looks like a large amount of code for a single API request, but it can be reused to build functions for other Coinbase API calls.
- Validate the authtoken submitted by the user.
- Refresh their Coinbase tokens.
- Make a GET request the coinbase wallet endpoint.
// Get the user's wallet data from Coinbase |
Frontend Web App
Now let’s finish up the frontend.
Auth Service
Let’s start by building a basic auth service.
I am interacting with the window object directly for the sake of simplicity, but it is only available in browser apps. If building for mobile, you will need to use a different strategy.
import { Injectable } from '@angular/core'; |
User Details Component
The user login button just
import { Component, OnInit } from '@angular/core'; |
The simply unwraps the user observable. If defined, it shows the UID and gives the user the ability to retrieve their bitcoin wallet details. Otherwise, it just shows the Login with Coinbase button.
<div *ngIf="auth.user | async as user; else login"> |
Auth Redirect
The auth redirect page is special because it should only be navigated to by Coinbase with a code query parameter. The component will parse the query param, then make an http request to the Cloud Function we created earlier.
The function should respond with the custom auth token, which we can pass off to AngularFire2 - and we’re logged in!
import { Component, OnInit } from '@angular/core'; |
Up Next
Now that we have a user base full or bitcoin millionaires, we need to give them some more ways to send, receive, and manage their crypto currencies. The next lesson will expand on this foundation with more advanced Coinbase integrations. Let me know if you have any questions in the comments or reach out on Slack.