
You have unlimited access as a PRO member
You are receiving a free preview of 3 lessons
Your free preview as expired - please upgrade to PRO
Contents
Recent Posts

- Object Oriented Programming With TypeScript
- Angular Elements Advanced Techniques
- TypeScript - the Basics
- The Real State of JavaScript 2018
- Cloud Scheduler for Firebase Functions
- Testing Firestore Security Rules With the Emulator
- How to Use Git and Github
- Infinite Virtual Scroll With the Angular CDK
- Build a Group Chat With Firestore
- Async Await Pro Tips
Progressive Web App Content Management With Contentful
Episode 65 written by Jeff Delaney
Full source code repo.
In this lesson, we will integrate Contentful with Angular 5. As an added bonus, I will show you how to use Firebase Cloud Functions and Cloud Messaging to broadcast push notifications when a new piece of content is published.
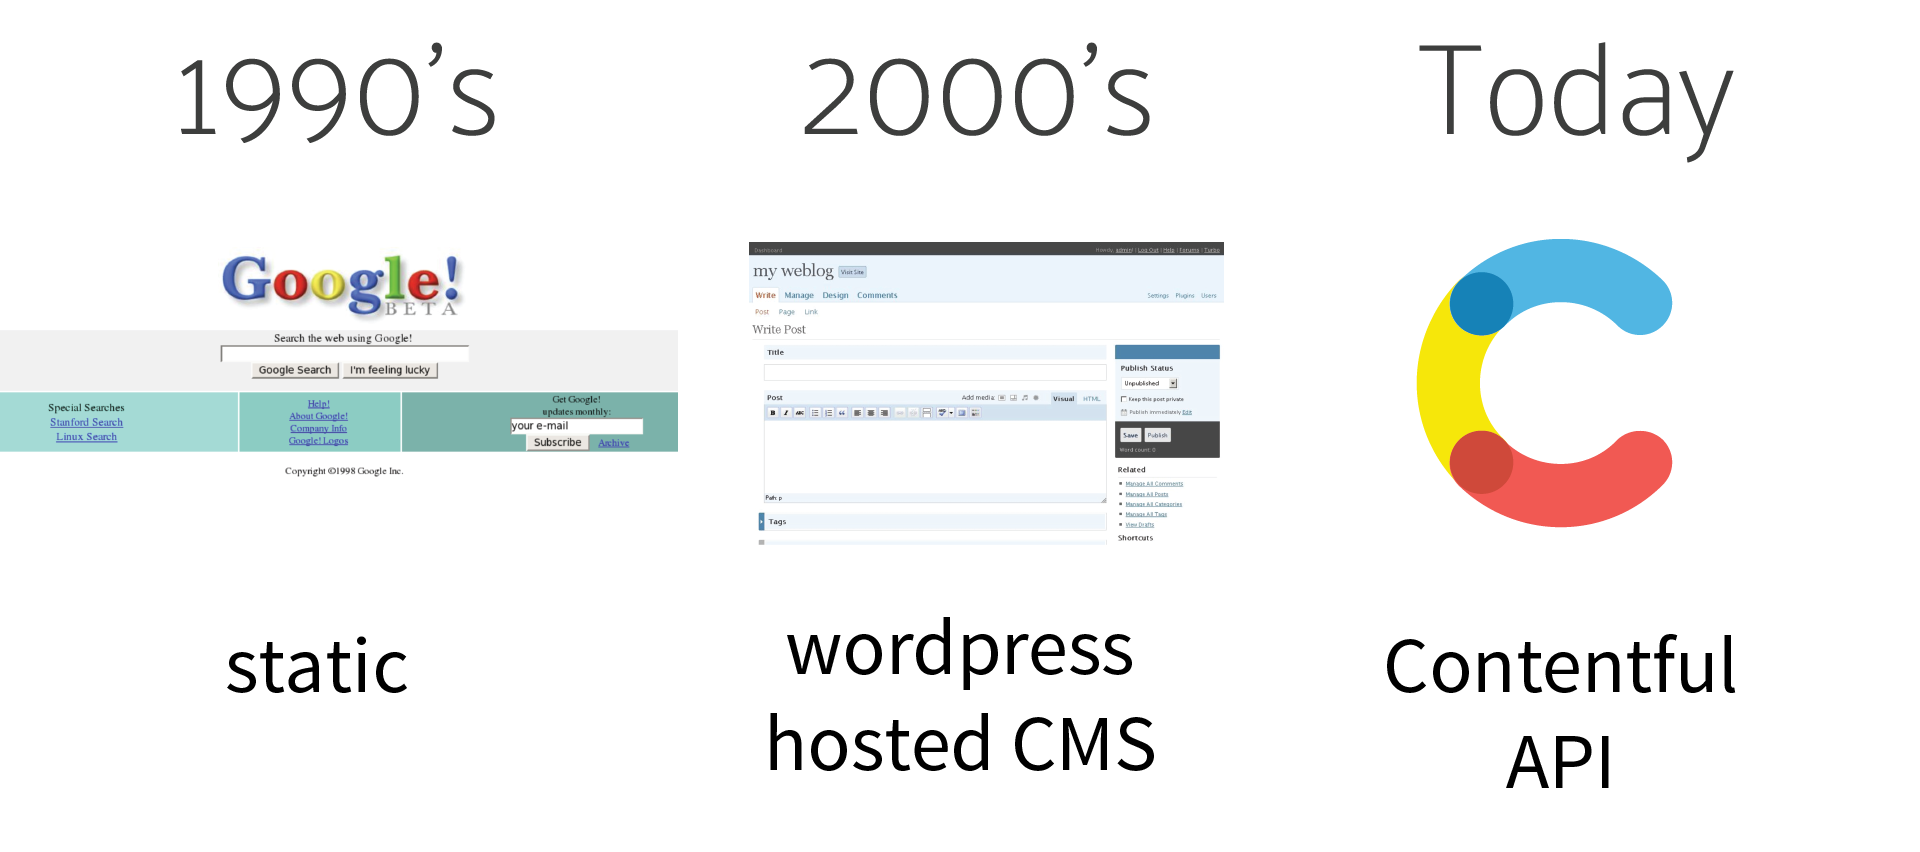
Let’s take a look at how content management systems (CMS) have evolved over the last couple decades. In the 1990’s we had static websites. In the 2000’s we had WordPress. Today we have programmable content with Contentful.
Big thank you to Frantic for suggesting this topic - check out their work for world-class web development inspiration.
Contentful Birds Eye View
Contentful allows you to manage content across multiple platforms. It breaks down content into programmable chunks. For example, a blog post could be represented as an object with a title, featured image, author, body, and tags array.
The benefit of breaking down content like this is that you can use it across multiple platforms. Your product might include a website, mobile app, and desktop app - but content is managed from a single source. This makes it easy for your team members to update content and build validation rules that will be consistent across your infrastructure.
Contentful is a powerful tool, and I recommend taking some time to get comfortable with its API. Watching their 30-min introduction demo is a great place to start.
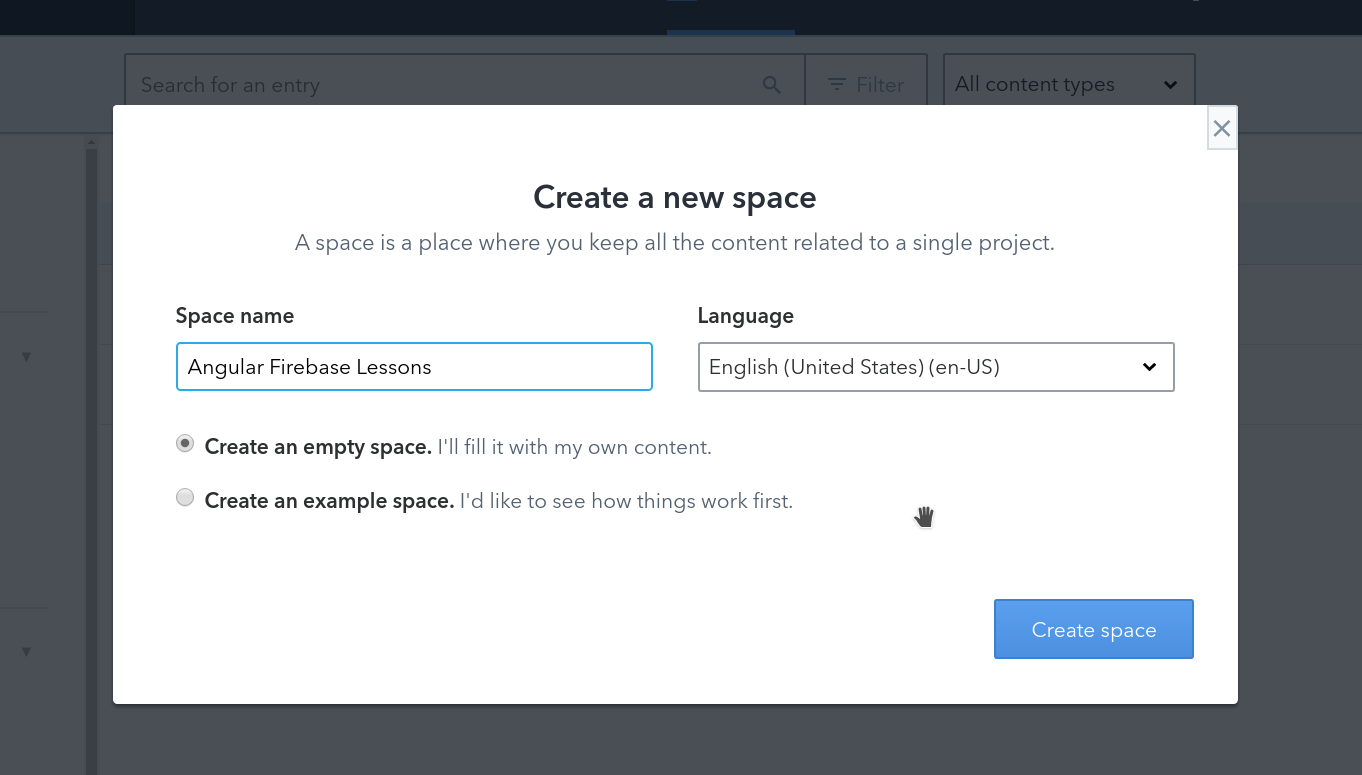
Step 1: Create a Space
To get started, you need to create a space. A space is just a container to keep your concerns organized in a unified package. For example, you would likely want a separate space for blog posts and e-commerce products.
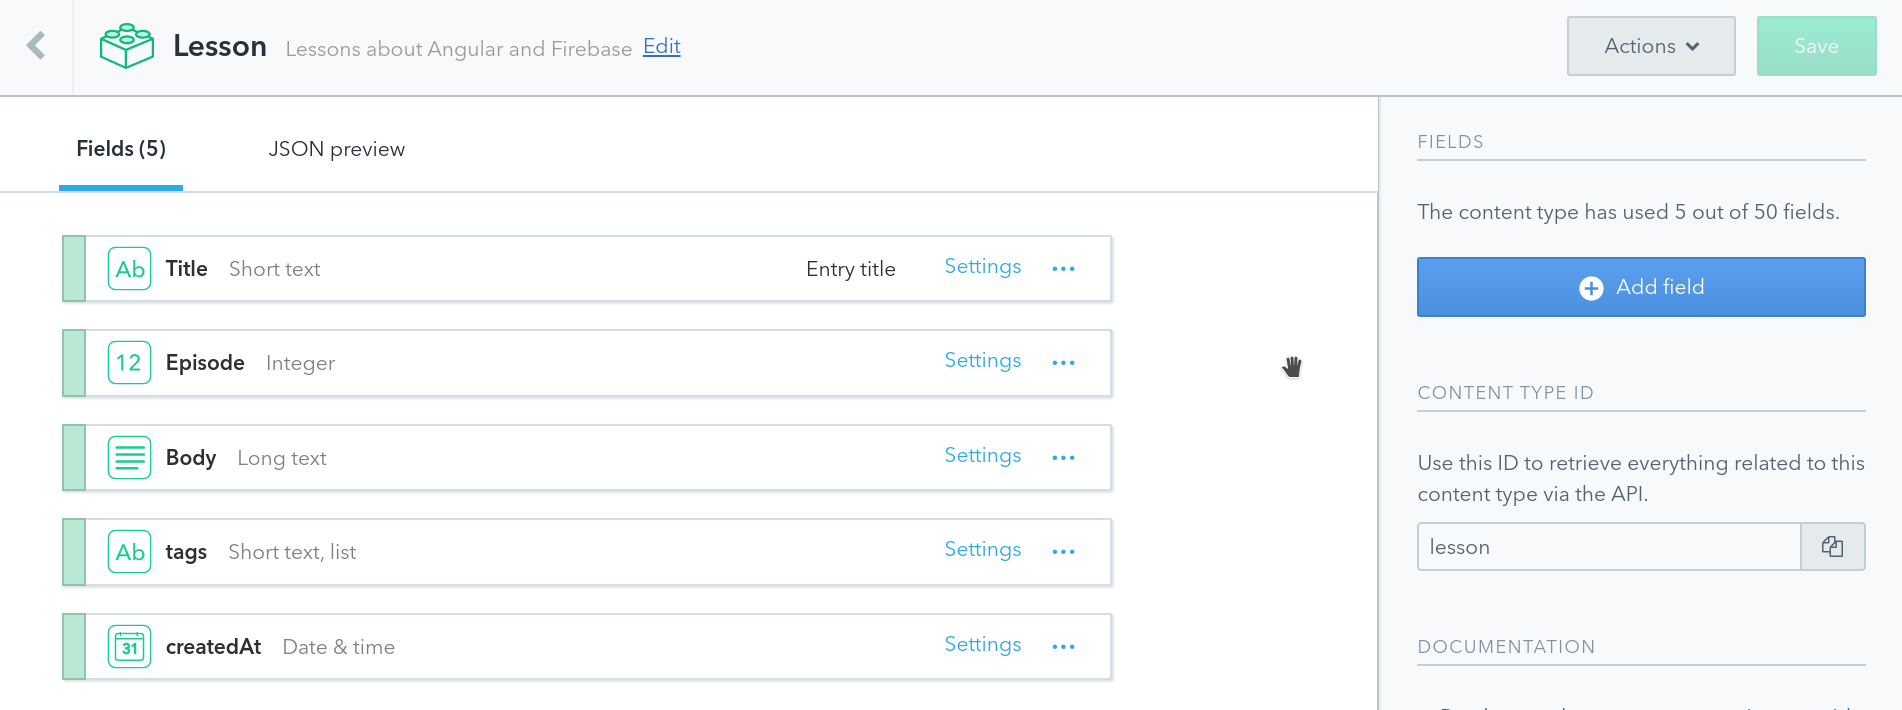
Step 2: Create a Content Type
For this tutorial, I am going to create a Lesson model in Contentful that mirrors the content you are reading right now. A content type is an interface or blueprint for any digital content you can envision - blog post, advertisement, author profile, tweet, photo, product, etc.
You build out your content type by adding various fields to it. In this case, our Lesson will need to have a title, episode number, timestamp, body, and a tag list.
A major benefit of building content this way is that you can standardize and validate each field.
Step 3: Create Some Unique Content
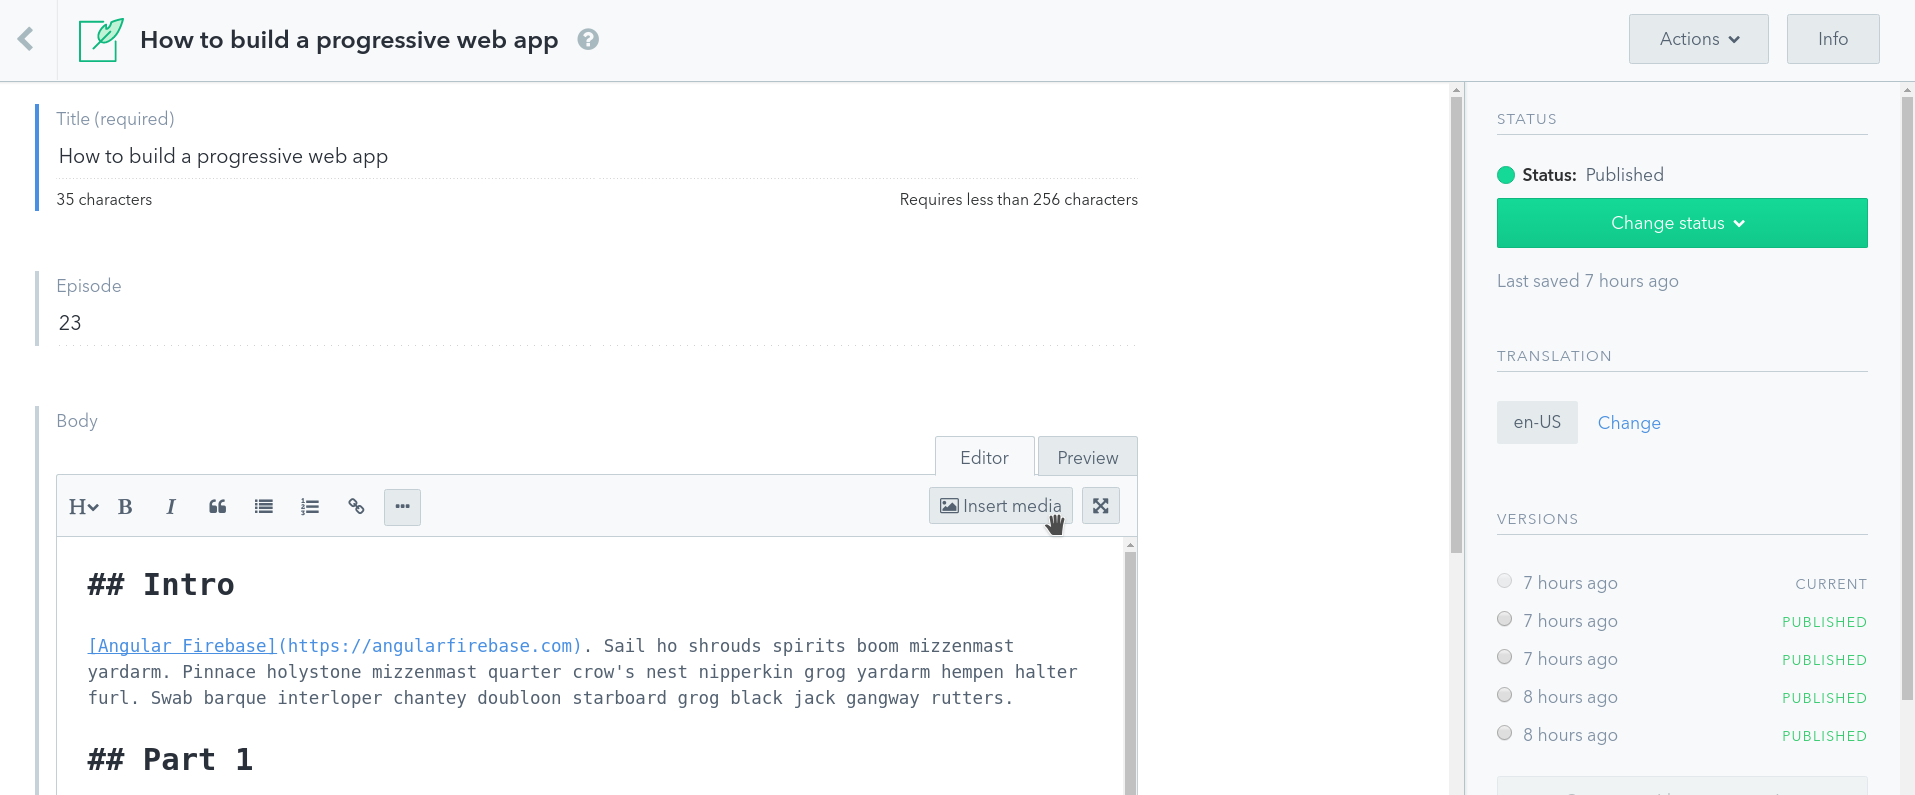
Now that you have your content blueprint laid out you can start creating real content. Each field will have a form input based on the corresponding field type. Long text is written in markdown format, which needs to be converted to HTML when we get into Angular.
Pretty simple - we now have a consistent model for lesson content and can broadcast it to multiple apps.
App Setup
I am starting from a brand new Angular app. Its only dependencies are the Contentful JavaScript SDK and marked (marked is used to convert markdown to HTML).
ng new lessonApp |
API Keys
Next, we need to add the API token and space ID to the Make sure to use the Content Delivery API token - not the content management token. I am keeping track of the credentials in my environment.ts file.
export const environment = { |
Displaying Content with the Contentful NPM Client
Now that we have a basic Angular app and some Contentful content, we need to connect the two together.
contentful.service.ts
The Contentful service will initialize the Contentful client and provide methods to request data from the API.
ng g service contentful --module app |
The getContent method makes the HTTP call the the lesson entry, which returns a Promise. To make it play well with Angular, I convert it to an Observable then map it down to its fields, which is an object with the actual data we want to display.
I also added a method called logContent that you can use to see the full JavaScript object in the browser console.
Don’t worry about the markdownToHtml method for now as it will be used in the next section.
import { Injectable } from '@angular/core'; |
app.component.ts
The app component will inject the service, then request the content as an Observable.
import { Component, OnInit } from '@angular/core'; |
In the HTML, we can unwrap the Observable with the async pipe and display its fields accordingly.
<div *ngIf="lesson$ | async as lesson"> |
Markdown to HTML
One issue that we’re currently facing is that Contentful returns the body text as a string in markdown format. Angular does not know how to read markdown, so we need a way to convert it to HTML.
Let’s create a pipe that can convert markdown to HTML in Angular.
npm install marked --save |
md-to-html.pipe.ts
The pipe will call the method markdownToHtml method from the service, which tells marked to convert the string into HTML.
import { Pipe, PipeTransform } from '@angular/core'; |
Then update the app component to use the pipe’s outputted HTML.
<div [innerHTML]="lesson.body | mdToHtml"> |
Only bind to the innerHTML property if you fully trust the source of the HTML. If users generate this content, you will need to sanitize their input to avoid XSS vulnerabilities.
Triggering Push Messages via Webhooks
Contentful also sends webhooks when your content changes. You can use webhooks to invoke Firebase Cloud Functions with HTTP triggers. This section will provide a Firebase Cloud Function for sending out push notifications for a topic, but you will need to follow the Push Notification lesson for an end-to-end working example.
Build the Cloud Function
First, initialize functions in your project.
firebase init functions |
This function assumes that you have subscribed users to receive messages based on a certain topic. In this example, they are subscribed to the lesson topic. You can read more about FCM topic messaging in the official docs.
const functions = require('firebase-functions'); |
Deploy the function, then copy the URL endpoint that it returns to you.
firebase deploy --only functions |
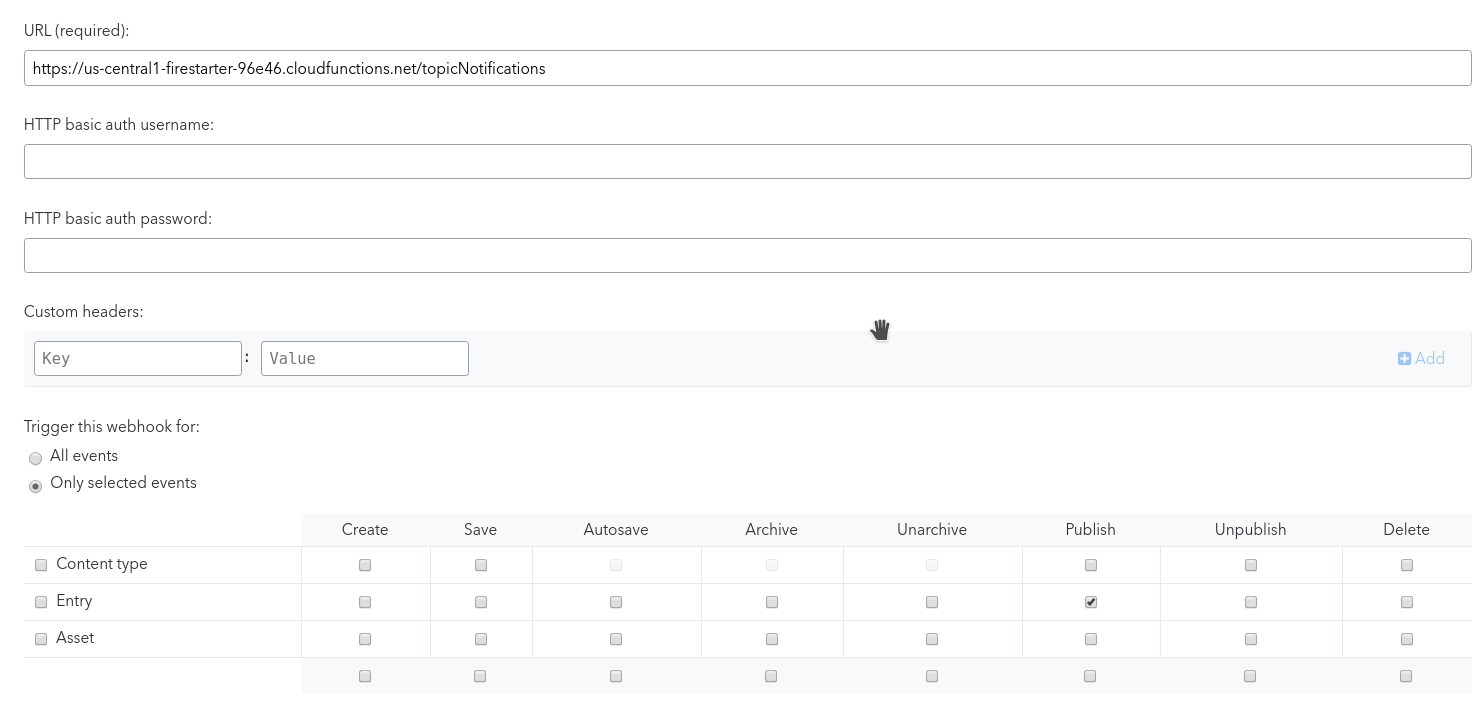
Update Webhooks in Contentful
Now we need to tell Contentful to send webhooks to our Cloud Function. Go into space setting -> webhooks and click Add Webhook. Copy and paste the deployed cloud function endpoint in the URL field. Also, select Only selected events and check the box that intersects Entry and Publish.
Now create a new post and you should see the webhook activity logged in Contentful and in Firebase. If you have Firebase Cloud Messaging enabled, your users should receive notifications on their subscribed devices.
The End
You now have a cross-platform content management system for your Angular PWA. Programmable content with Contentful is an excellent choice for developers who hate the tedious task of re-deploying multiple apps each time some static content changes.