
You have unlimited access as a PRO member
You are receiving a free preview of 3 lessons
Your free preview as expired - please upgrade to PRO
Contents
Recent Posts

- Object Oriented Programming With TypeScript
- Angular Elements Advanced Techniques
- TypeScript - the Basics
- The Real State of JavaScript 2018
- Cloud Scheduler for Firebase Functions
- Testing Firestore Security Rules With the Emulator
- How to Use Git and Github
- Infinite Virtual Scroll With the Angular CDK
- Build a Group Chat With Firestore
- Async Await Pro Tips
Topic-Based Web Notifications With Ionic4 and Cloud Messaging
Episode 137 written by Jeff Delaney
Health Check: This lesson was last reviewed on and tested with these packages:
- Angular v6
- RxJS v6.2
- @angular/fire v5.0.0
- Ionic v4
Find an issue? Let's fix it
Broadcasting push notifications to millions of users simultaneously is amazingly simple when you combine Firebase Cloud Messaging (FCM) with Callable Cloud Functions. Throw Ionic 4 into the mix you get beautiful UI elements out of the box to handle messages in the app. The following lesson is a comprehensive guide for building topic-based web notifications.
The Notification Process
There are several steps in the web push notification process. Here’s the rundown.
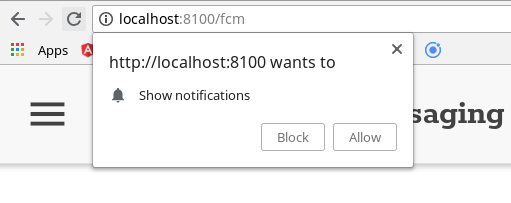
(1) Get permission from the user. FCM will return a device token (just a string) if the user clicks allow.
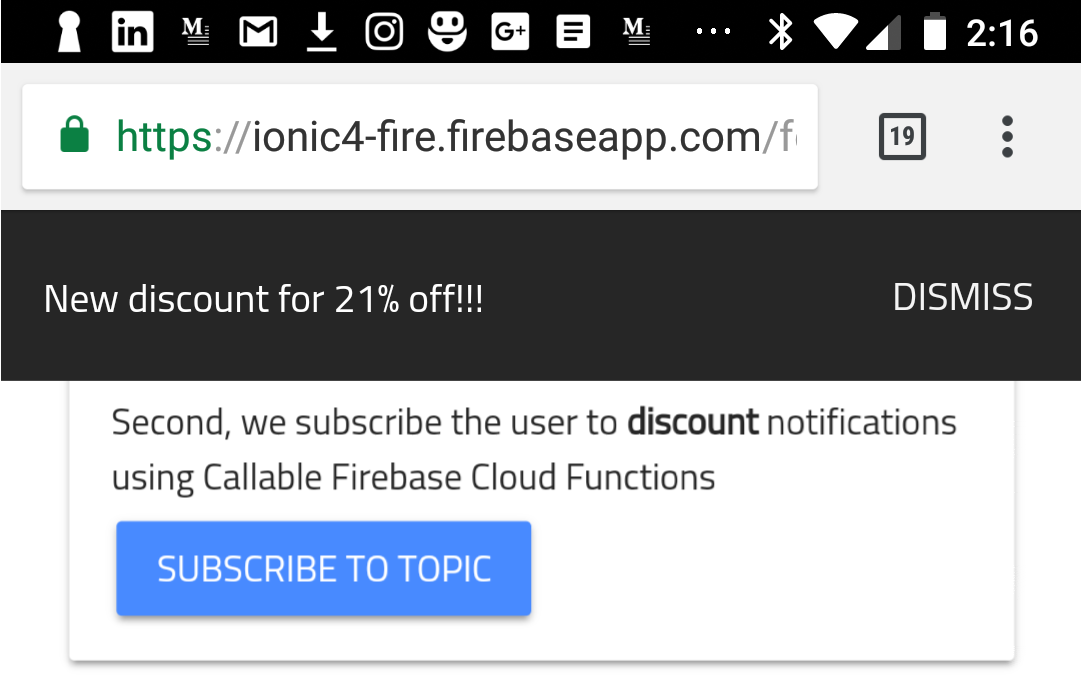
(2) Subscribe the device token to a topic using the Admin SDK in a Callable Cloud Function
(3) Broadcast messages using the using the Admin SDK on a Firestore Cloud Function
(4a) Handle the notification in the app foreground with an Ionic component.
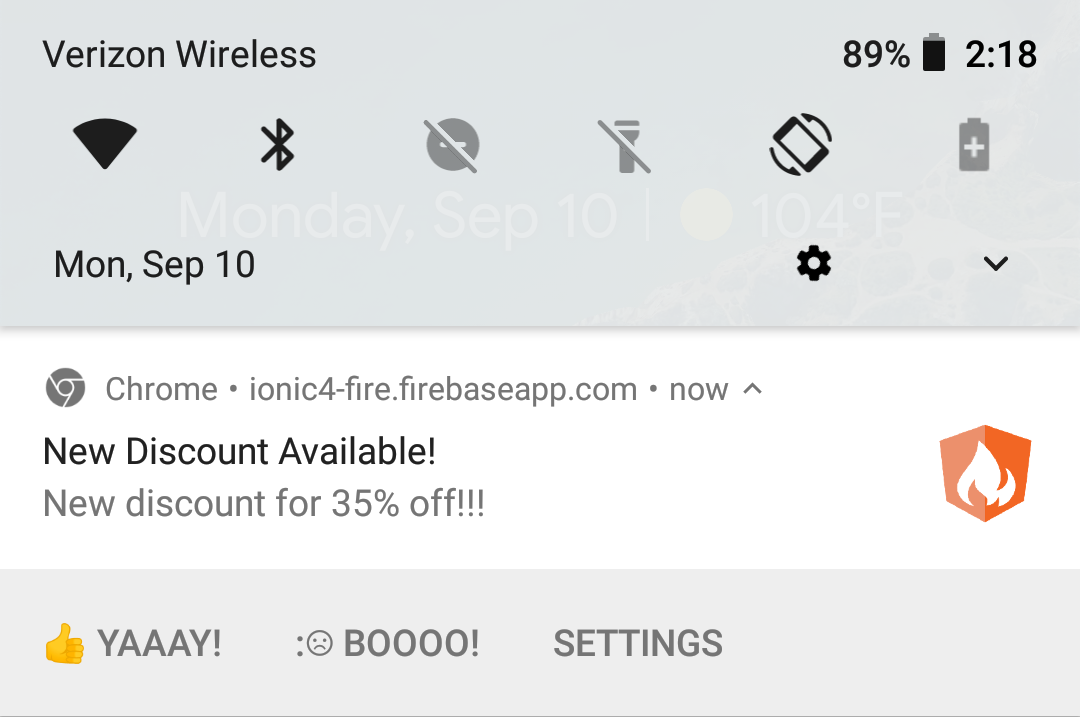
(4b) Handle the notification in the app backgorund on the browser or native device
Web notifications work almost everywhere, including Android Chrome, but the main holdout is iOS Safari, so they will not currently work for iPhone users.
Initial Setup
This lesson is focused on web notifications only. If you need to send notifications on native mobile devices, like iOS and Android, enroll in the Full Ionic Courses.
We have a few initial setup chores needed to get started. First, create a new file for the service worker firebase-messaging-sw.js and add the following code to it:
importScripts('https://www.gstatic.com/firebasejs/5.4.2/firebase-app.js'); |
We need to ensure this file is included in the production build by registering it in the angular.json
// ...omitted |
Cloud Functions for Firebase Messaging
At this point, we need a backend that uses the Firebase Admin SDK to subscribe to topics and send messages.
firebase init functions |
Subscribe and Unsubscribe to Topics
Callable Cloud Functions for Firebase will allow us to write backend code that can be called directly. They are similar to HTTP functions, but more streamlined by bypassing the things like HTTP clients and auth middleware. We will send a token and topic from our frontend to subscribe to topics.
export const subscribeToTopic = functions.https.onCall( |
Send a Notification on Firestore Document Create
Another function is needed to send the actual message. In this demo, the notification is broadcast to all subscribed devices when a new document is created in the discounts collection.
The web, Android, and iOS all have different notification APIs, which can be customized in the notification payload.
export const sendOnFirestoreCreate = functions.firestore |
Customizing the Message
Every platform (web, iOS, and Android) has its own spec for notification formatting. They share common elements - like a title and body - but differ from there. You can customize the message payload passing an object with settings for each platform.
const payload: admin.messaging.Message = { |
FCM Service
In Ionic or Angular, I recommend setting up a dedicated messaging service because you will likely need it in multiple components.
ionic g service fcm |
At the time of this article there is a bug in AngularFireMessaging. See the comments in the code below to fix it.
import { Injectable } from '@angular/core'; |
Show Toast Messages in Ionic
When the app is running we need a good-looking UI element to display the message. An Ionic toast is the perfect tool for this use-case.
async makeToast(message) { |
Get Notification Permission and Show Messages
We need to get permission to send messages for this device, then maintain the token as a property on this service. The second method handles a stream of messages and displays a toast whenever a new notification is emitted.
getPermission(): Observable<any> { |
Use the Callable Functions
We can subscribe the token to a topic by calling our callable functions.
sub(topic) { |
Receiving Messages
The final step is to put our service to use in a component. I would recommend subscribing to notifications in the root app.component.ts to ensure that notifications are always handled in the foreground when the app is being actively used.
({ |
The other methods can be used in the UI component responsible for handling topic subscriptions. Just inject the service publicly and bind the methods to HTML buttons.
import { FcmService } from '../services/fcm.service'; |
<ion-button (click)="getPermission()">Grant Permission</ion-button> |
Tip: Revoke Notification Permission in Chrome
When developing, it is useful to revoke permission to send messages to ensure the grant permission process is working properly. You can do this by navigating to chrome://settings/content/notifications and removing token for localhost:8100 or whatever URL you’re hosting locally.