
You have unlimited access as a PRO member
You are receiving a free preview of 3 lessons
Your free preview as expired - please upgrade to PRO
Contents
Recent Posts

- Object Oriented Programming With TypeScript
- Angular Elements Advanced Techniques
- TypeScript - the Basics
- The Real State of JavaScript 2018
- Cloud Scheduler for Firebase Functions
- Testing Firestore Security Rules With the Emulator
- How to Use Git and Github
- Infinite Virtual Scroll With the Angular CDK
- Build a Group Chat With Firestore
- Async Await Pro Tips
Firebase OAuth Login With Custom Firestore User Data
Episode 55 written by Jeff Delaney
Health Check: This lesson was last reviewed on and tested with these packages:
- Angular v6.0.3
- RxJS v6.2
- @angular/fire v5
Update Notes: AngularFire2 has been moved under the official Angular repo. The lesson has upgraded its packages from angularfire2 to @angular/fire.
Find an issue? Let's fix it
Source code for Firebase OAuth Login With Custom Firestore User Data on Github
Update! Watch the latest video and get the most up-to-date code from Google OAuth Firebase Angular on Fireship.io
In this lesson, I am going to show you how to build an OAuth authentication feature using the Google sign-in method. We will also save custom user data to the Firestore database, making it possible to manage custom user data and/or loop over all your users at once.
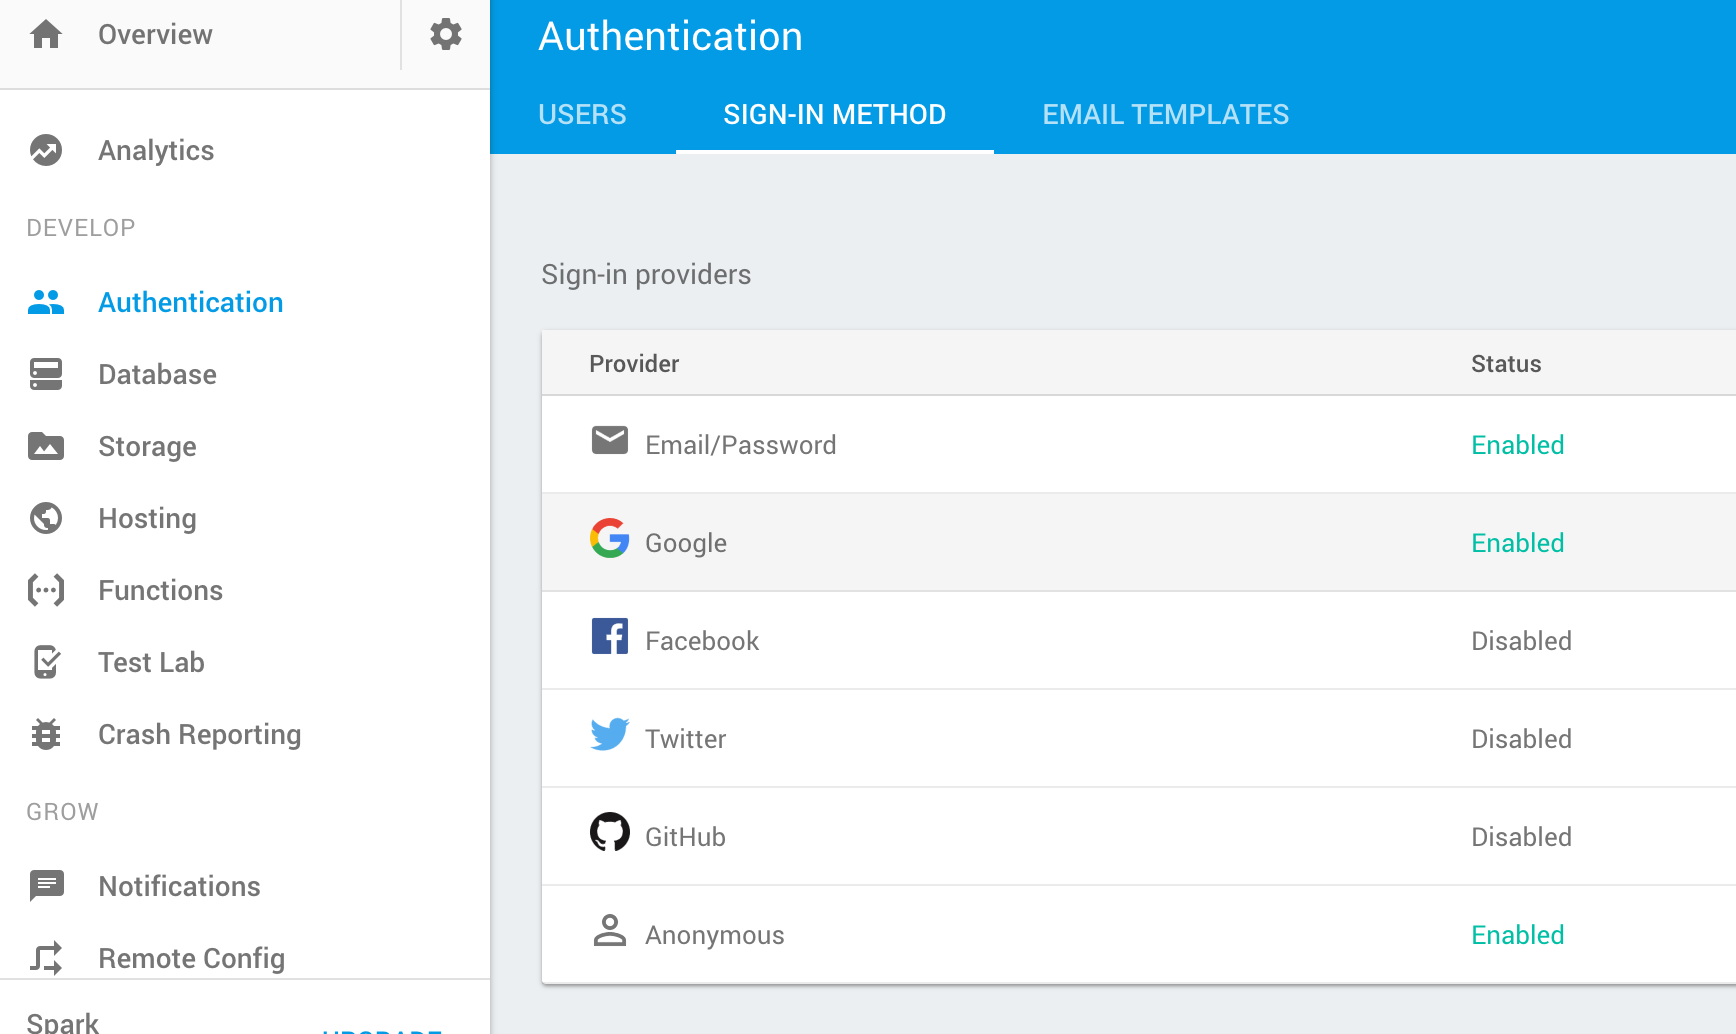
Step 1: Activate OAuth Providers in Firebase
I am using the Google auth provider because it works without any additional configuration. You can follow the same exact steps for Facebook, Github, and Twitter, but you will need to get credentials from a developer account for each app you plan on using.
Step 2: Install AngularFire v5 and Create a Core Module
Make sure you have @angular/fire (formerly angularfire2) v5 installed in your Angular app. Following the initial install instructions here if starting from scratch. If you are upgrading an existing Angular project, make sure the AngularFire version in package.json is at least up to 5.0.0.
Generate a Core Module (Optional)
Although technically optional, it is a good design pattern to keep your authentication setup in a core module. The purpose of a core module is to provide services that your app will use globally, such as authentication, logging, toast messages, etc.
ng g module core |
Add the AngularFire Firestore and Auth modules to your core module (unless they are already in your app module). After you finish this lesson, the core module should look something like this.
import { NgModule } from '@angular/core'; |
Then add the core module to your app.module imports section.
import { CoreModule } from './core/core.module'; |
Step 3: Auth Service
ng g service core/auth |
The auth service is where most of the magic happens. It facilitates the sign-in process, watches the user session, and allows us to save custom user data to the Firestore database. Here’s a breakdown of everything that is happening in the code.
interface User: The interface declares the properties of the custom user object. Feel free to add any custom data you want here to extend the basic Firebase auth data.constructor(): The constructor will set the Observable. First it receives the current Firebase auth state. If present, it will hit up Firestore for the user’s saved custom data. If null, it will return anObservable.of(null).googleLogin(): This method triggers the popup window that authenticates the user with their Google account. It returns a Promise that resolves with the auth credential. TheoAuthLogin()method is useful if you have multiple OAuth options because it can be reused with different providers.updateUserData(): This private method runs after the user authenticates and sets their information to the Firestore database. We pass the{ merge: true }option to make this a non-destructive set.
import { Injectable } from '@angular/core'; |
Step 4: Auth Guard
ng g guard core/auth |
The next thing we want to do is protect our routes from unauthenticated users. Now that we have an observable in the service, we can handle this task easily with a canActivate guard. We just pass it the observable of the user from the auth service. If it emits true, the route can be accessed. If false, the user is redirected to the login page.
import { Injectable } from '@angular/core'; |
You can use the guard in your router by simply adding it to the canActivate array for a given route, for example:
const routes: Routes = [ |
Step 5: User Profile
As a final step, let’s create a user profile so you can see how to use the user Observable in the HTML.
ng g component user-profile |
The component TypeScript just needs to have the auth service injected as a public property in the constructor.
import { Component } from '@angular/core'; |
In the component HTML, we have two separate templates that are shown conditionally based on the user Observable data. If it’s null, we show the guest template, but if it’s present we can show the authenticated template and corresponding user data.
I have also added a Google Login button to the profile, but you might consider making it a standalone component that you can use outside of the user profile.
|
The End
That’s it for basic OAuth with Firebase. Now you can start saving custom user information to firestore to build a complex and robust user authentication system.