
You have unlimited access as a PRO member
You are receiving a free preview of 3 lessons
Your free preview as expired - please upgrade to PRO
Contents
Recent Posts

- Object Oriented Programming With TypeScript
- Angular Elements Advanced Techniques
- TypeScript - the Basics
- The Real State of JavaScript 2018
- Cloud Scheduler for Firebase Functions
- Testing Firestore Security Rules With the Emulator
- How to Use Git and Github
- Infinite Virtual Scroll With the Angular CDK
- Build a Group Chat With Firestore
- Async Await Pro Tips
Angular Progressive Web Application PWA With 100 Lighthouse Score
Episode 45 written by Jeff Delaney
Learn how to create a PWA with the new Angular 5 service worker
The term Progressive Web App (PWA) refers to a set of modern features provided by a web app that make it offline capable and installable on certain devices. Google provides an exhaustive list of the requirements, but most of them can be checked off with a few simple steps.
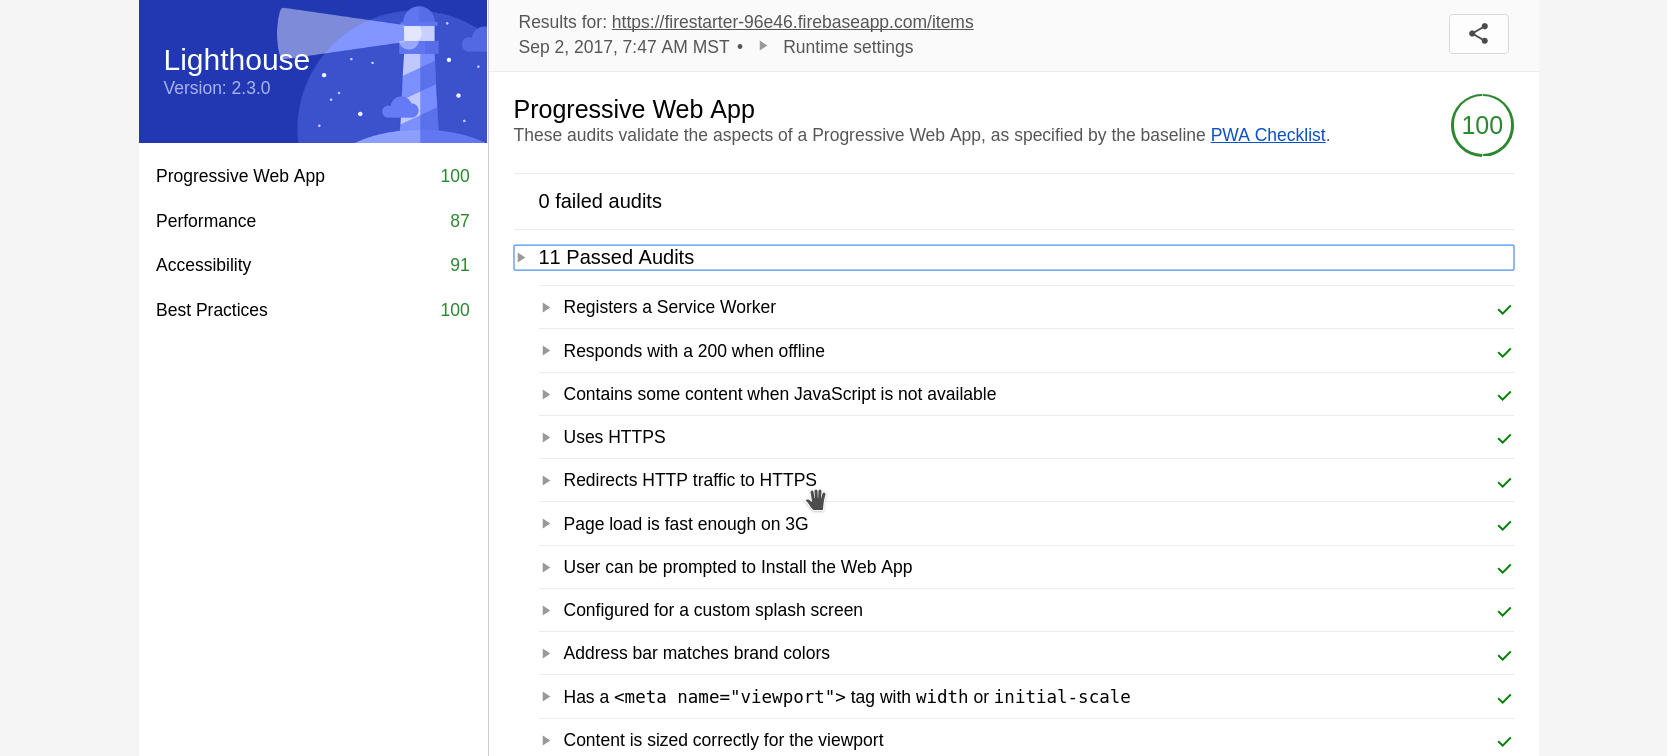
In this lesson, I will show you how to build and deploy a fully fledged Angular 4.3 progressive web app that gets a 100 Lighthouse Audit Score.
Why Build a Progressive Web App?
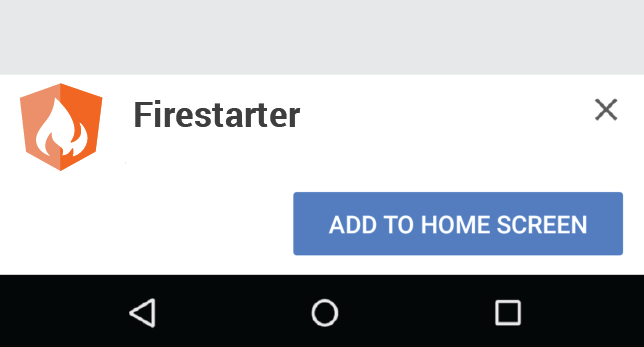
- Installable. Many devices such as the Chrome Browser and Android will allow PWAs to be installed similar to a native apps. This means users will see “Add to Homescreen” when browsing on mobile.
- User Experience. The PWA checklist is designed to improve the user experience based on proven design principles. Our goal as developers is to create great user experiences, so that alone should give you some motivation.
- Offline capable. Your app will be cached with a service worker, which means your web app will always be online (although limited) even when the internet goes out.
At the time of writing, iOS Safari and Edge Browser do not fully support all PWA features, but they are moving in that direction quickly. You can keep up on the progress of this technology at Is Service Worker Ready?
Requirements for an Angular App to be Installable
Making an Angular app installable means adhering to the Google PWA checklist. The list is long, but we can subdivide the challenges into three main parts.
- Create a manifest with app details and icons
- Enable offline caching with a Service Worker
- Deploy to secure HTTPS hosting
We will knock-out the entire checklist in three simple steps.
Step 0. Install the Lighthouse Chrome Plugin
The Lighthouse plugin for Chrome is the primary way to determine if your app is meeting the PWA spec. If there are any issues, the plugin will tell you specifically what’s going wrong. We’re only focused on the PWA score, but it also gives you feedback on design best practices and performance.
Step 1. The Manifest
The manifest.json file allows you to specify important metadata related to your web app. This will determine how your Angular app appears when being installed on a device.
Basic Manifest and Meta Tags
In the head of the HTML, we will link the manifest file and add several meta tags specifically for PWAs. Add the following meta tags to index.html
<head> |
Then create a file /src/manifest.json. Inside this file we will define the configuration for our progressive web app. Devices supporting PWAs will use this file to make the app installable and treat it differently than a traditional website. The properties shown below are the bare minimum requirements to meet PWA standards.
{ |
Generating Icons
You don’t need go through the tedious process of resizing your logo 20 times for each icon. There are many free online icon generators that will create the manifest and images from a single base image. Here are a couple generators that I like.
Once you have your icons, you just need to point the src to the assets directory in Angular in the manifest.json, like so:
"icons": [ |
Eventually, your images should look something like this in chrome.
![]()
Update Angular CLI Assets
Make sure to register the manifest in the angular.cli.json file to ensure it is included in the production build.
"apps": [ |
Step 2. The Service Worker
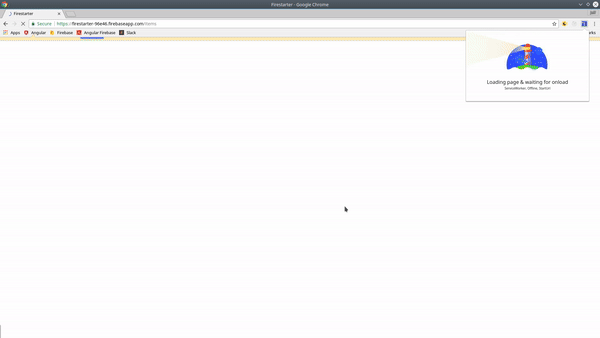
Web service workers are perhaps the most important aspect of PWAs. They sit in the background of the device and perform tasks like caching resources and listening for push notifications. In order to be considered a PWA, we need to use the service worker to cache the app so it can provide interaction even when offline.
Registering a Service Work in Angular
Add a simple script in the body of the index.html file to register the worker.
<body> |
Caching Assets with SW-Precache
In order to build our worker for caching, we are going to take advantage of SW-Precache and it’s wrapper for Webpack. SW-Precache is a tool created by Google that will generate the service worker code automatically based on our configuration instructions.
npm install sw-precache-webpack-plugin --save-dev |
Now create a file in the root of your project called precache-config.js. This file tells SW-Precache how to create the worker. The worker can only be created after generating an app build in the dist/ folder. Here’s the full configuration, then we will deploy it in the next step.
var SWPrecacheWebpackPlugin = require('sw-precache-webpack-plugin'); |
That’s it! The service-worker.js file will be automatically generated after we configure our production build in the next step.
Step 3. Deploy to HTTPS Hosting with Firebase
It is necessary for a PWA to be served with an SSL certificate over HTTPS. A few years in the past, setting up SSL/HTTPS on a website from scratch was difficult and expensive. Modern developers using services like Firebase, Heroku, or Cloudflare have it easy. With Firebase, we can deploy the app to HTTPS hosting with a single command for free.
Custom Angular Build Command
In the package.json file you can write a custom command to build the app for deployment. This step is not absolutely necessary, but it is a good idea so you don’t accidentally forget to build the worker when deploying.
"scripts": { |
Run the command below to build the app. If you look in the dist folder, you should see the service-worker.js that was automatically generated by SW-Precache.
npm run pwa |
If you’re just starting with Firebase hosting, check out my Firebase hosting deployment for Angular lesson. Once you’re configured for hosting, just run.
firebase deploy --only hosting |
Now you should be able to test your deployed PWA with Lighthouse and get a score of 100.