
You have unlimited access as a PRO member
You are receiving a free preview of 3 lessons
Your free preview as expired - please upgrade to PRO
Contents
Recent Posts

- Object Oriented Programming With TypeScript
- Angular Elements Advanced Techniques
- TypeScript - the Basics
- The Real State of JavaScript 2018
- Cloud Scheduler for Firebase Functions
- Testing Firestore Security Rules With the Emulator
- How to Use Git and Github
- Infinite Virtual Scroll With the Angular CDK
- Build a Group Chat With Firestore
- Async Await Pro Tips
Ionic Google Login With Firebase and AngularFire
Episode 90 written by Jeff Delaney
Health Check: This lesson was last reviewed on and tested with these packages:
- Angular v6
- @angular/fire v5
- ionic v3 or 4
Update Notes: Instructions added for Ionic 4 and changed imports to @angular/fire
Find an issue? Let's fix it
Source code for Ionic Google Login With Firebase and AngularFire on Github
My goal is to give you a clear and definitive guide for configuring Google login in an Ionic v3+ app with Firebase. I reviewed about a half-dozen tutorials out on the web, but did not find any that actually work end-to-end, so I feel compelled to write this guide.
This lesson is for developers targeting native mobile devices with ionic and is compatible with both Android and iOS. If you’re building a Progressive Web App, check out my Firebase PWA OAuth tutorial.
UPDATE Ionic v4. This tutorial was originally written for Ionic 3. The process is almost the same, with just a few minor changes outlined in the Ionic 4 Native Google Plus Login section.
Google Plus Login with Ionic 4
Google Plus login in Ionic 4 follows the same steps outlined below with a few minor exceptions. You must have a 5.0.0 or greater version of the native plugin (currently at beta.17)
npm i @ionic-native/google-plus@^5.0.0-beta |
The native plugin import should come from the npx namespace.
import { GooglePlus } from '@ionic-native/google-plus/npx'; |
Now follow the remaining steps below, keeping these differences in mind. If you run into issues or changes in Ionic 4, please report them in the comments.
Initial Setup
Make sure you have Ionic installed, then run the command below with your own app ID, following this format com.<brandname>.<appname>.
ionic start myProject tabs --id com.angularfirebase.myproject |
Setting an ID will override the default provided by Ionic (io.ionic.starter). If you have an existing app, you can update it in the config.xml file.
<widget id="com.angularfirebase.myproject" ...> |
AngularFire Install
I am also assuming you have a Firebase account and project created. Now install the Firebase SDK and AngularFire in Ionic by running:
npm install firebase @angular/fire promise-polyfill --save |
App Module
From here we need to initialize the Firebase app and import AngularFireAuthModule in the app module.
import { AngularFireModule } from '@angular/fire'; |
Register your iOS and Android Apps in Firebase
We’re going to target and test on both iOS and Android emulators. The setup is slightly different for both.
iOS Setup
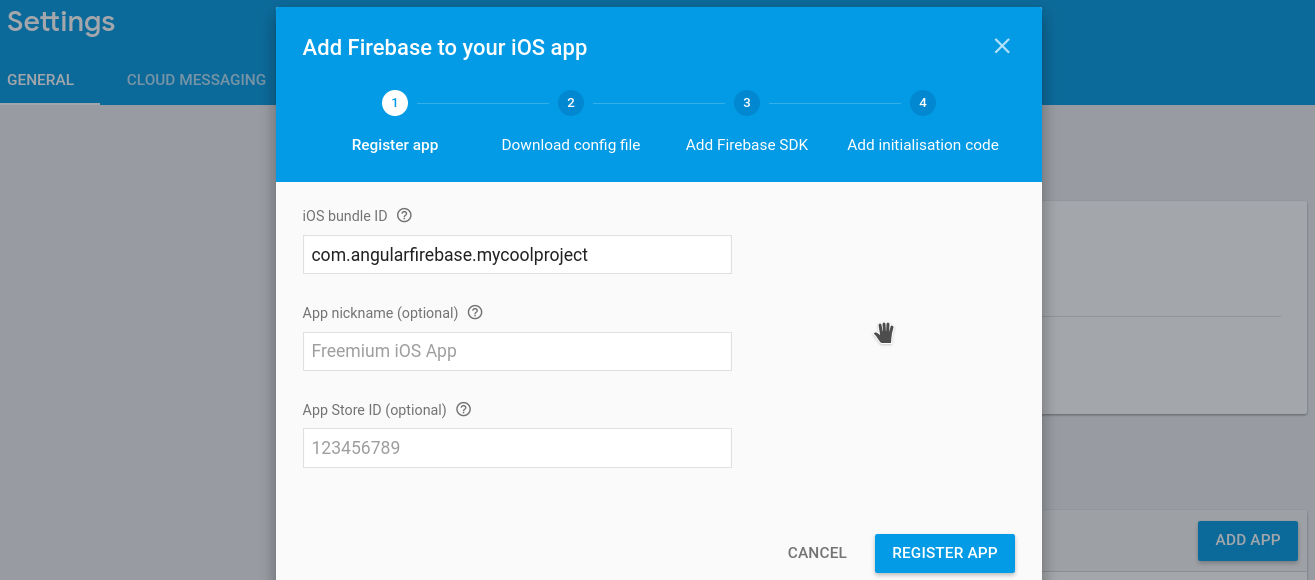
From the Firebase console project settings, click the link that says Add Firebase to your iOS App.
The only thing we need is the ID we configured back in Step 1 - com.angularfirebase.myproject.
Android Setup

Again, we enter the same ID com.angularfirebase.myproject, but we also need to add the SHA-1 fingerprint to allow Google to create an OAuth2 client for our app.
Run the following command and enter android as your password when prompted.
keytool -exportcert -list -v -alias androiddebugkey -keystore ~/.android/debug.keystore |
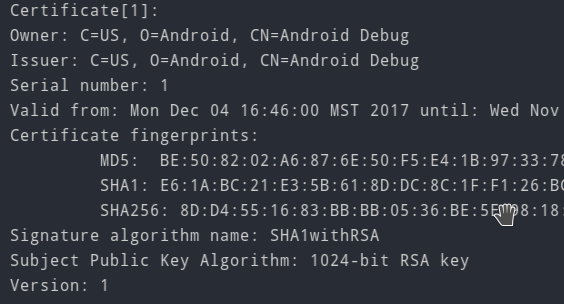
This should give you output similar to the screenshot above - simply copy and paste the SHA-1 certificate into the form.
Sweet! Your iOS/Android Ionic app now has a foundation that will facilitate integration with Google OAuth, Firebase Analytics, and all that good native mobile Firebase stuff.
Native Google Plus Cordova Plugin Install
Signin with Google OAuth from AngularFire will not work on Native mobile devices out of the box (window popups or url redirects don’t exist on native platforms). We need to use the Google Plus Cordova Plugin to help us out here.
Keep in mind, we will still use AngularFire to observe the current user, but we need native functionality for the initial signin process.
The REVERSED_CLIENT_ID is required for iOS only. You can find the value in the GoogleService-Info.plist file on the Firebase console in your iOS app project settings.
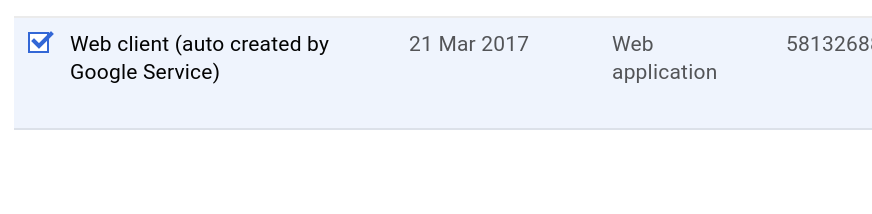
The WEB_APPLICATION_CLIENT_ID is found by going to the GCP console API Identity toolkit. Then select the clientID for web application.
ionic cordova plugin add cordova-plugin-googleplus --variable REVERSED_CLIENT_ID=yourReversedClientID --variable WEB_APPLICATION_CLIENT_ID=yourwebapplicationclientid |
Implementing Google Auth
Now we need a component that will execute the login process and authenticate the user in our app.
ionic generate component google-login |
This will automatically generate a components.module, but we need to add a few extra imports to get access to shared components from Ionic and Angular.
import { NgModule } from '@angular/core'; |
Setting up the HTML
The google-login component is just a fancy button that can kick-off the OAuth process. For the sake of this demo, I will show an Already Logged In me
OAuth Login for iOS, Android, or PWA
We’re finally to the point where we build our login flow. First, let’s inject our dependencies make a reference to user Observable.
import { Component } from '@angular/core'; |
Now this part is important because you need your webClientId and it’s easy to mix up. You find it by going to the GCP console API Identity toolkit. Then select the clientID for web application.
async nativeGoogleLogin(): Promise<void> { |
Web login follows a similar process, but is sligtly easier because AngularFire does most of the heavy lifting.
async webGoogleLogin(): Promise<void> { |
And now we just check for the platform and run the appropiate async metho. If cordova is detected we know we should run the native login flow, otherwise we run the web browser login.
googleLogin() { |
The End
You’re Ionic app now has a solid function with Firebase and Google OAuth. Now you just need to build some awesome features into it so you can make raking in revenue from the app store.