
You have unlimited access as a PRO member
You are receiving a free preview of 3 lessons
Your free preview as expired - please upgrade to PRO
Contents
Recent Posts

- Object Oriented Programming With TypeScript
- Angular Elements Advanced Techniques
- TypeScript - the Basics
- The Real State of JavaScript 2018
- Cloud Scheduler for Firebase Functions
- Testing Firestore Security Rules With the Emulator
- How to Use Git and Github
- Infinite Virtual Scroll With the Angular CDK
- Build a Group Chat With Firestore
- Async Await Pro Tips
Role-Based User Access Control With Firebase
Episode 40 written by Jeff Delaney
There is a newer version of tutorial! Please visit Role-Based Authorization with Firestore and Angular 5 for the latest and greatest content.
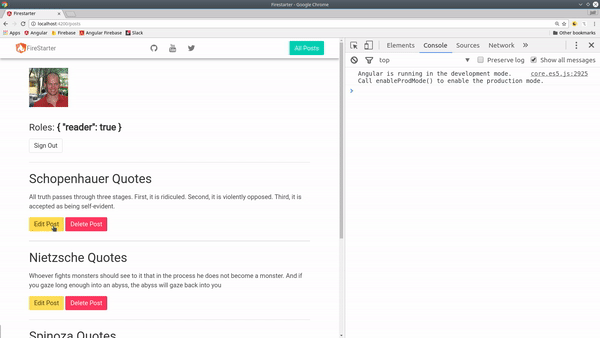
Role-based user authorization (or access control) will give you fine-grained control over user permissions for Firebase users. The role-based strategy is an excellent option for apps that have different user tiers and access levels - think discussion forums, stack overflow, reddit, etc. In this lesson we are going to give Firebase users 3 different roles (which can be expanded easily) - reader, author, and admin.
- Admin: Can edit or delete any post.
- Author: Can edit posts.
- Reader: Can only read data
Once you have assigned roles to your Firebase users, you have at least 4 different ways to restrict access in Angular. We will cover all four of these strategies in this lesson.
- Hide HTML elements based on role.
- Prevent actions based on role.
- Restrict routes based on role with Angular Router Guards.
- Create backend Firebase database rules.
App Setup
The app in this lesson is based on the Firestarter Demo App, which uses Angular4 and is integrated with the AngularFire package.
Also note that we have an app.router.module that was created when the app was initially generated. If you don’t have a router configured yet, check out the Angular routing docs to get up to speed.
To demonstrate user roles, we need something to lockdown. In this example, we are going to give users permissions to interact with posts - keep it simple.
ng g service auth |
Custom User Class
ng g class user |
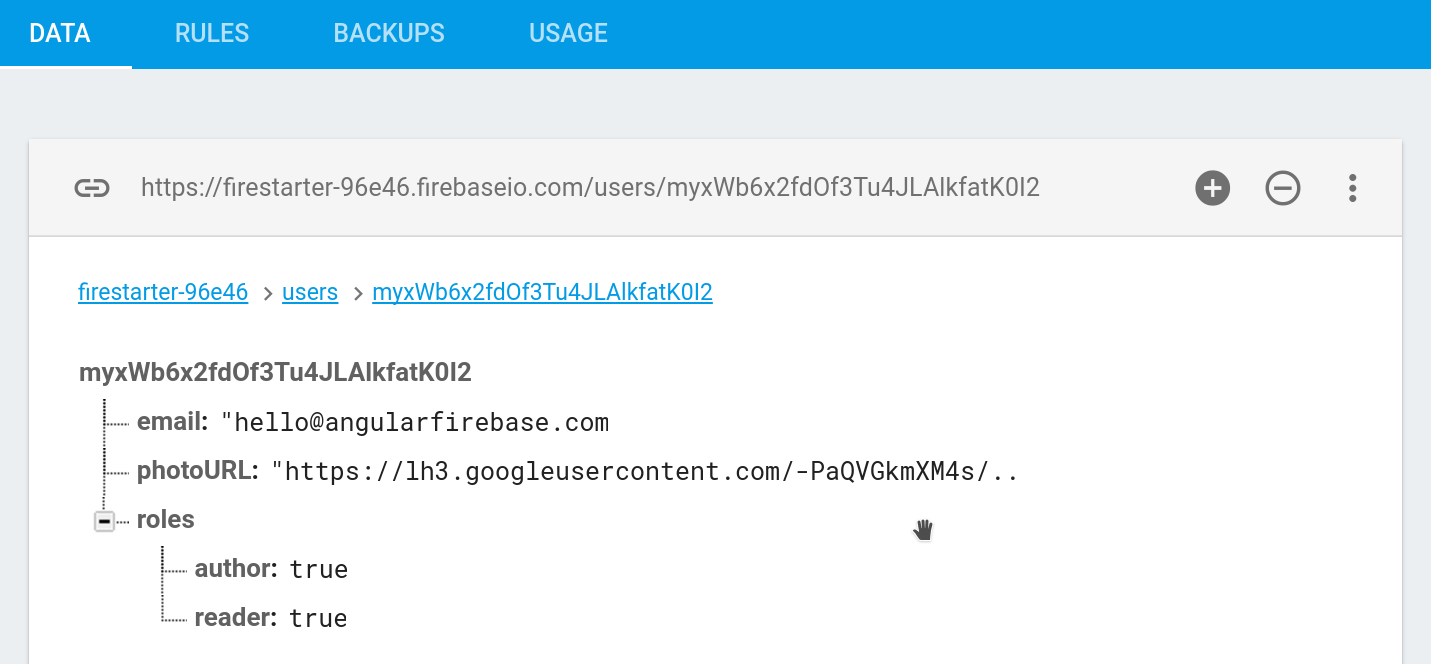
It’s not possible to add new properties directly to the Firebase auth object, but we can add custom data to the database. Below is a custom User model that uses a typescript interface to define the roles on the user. When a new user is created, we give them a default role level of reader.
export interface Roles { |
This is how the User class will look in the Firebase database.
Authentication Service
Now we need to create an authentication service that will use this custom user class, rather than the standard Firebase auth data. We do this by calling switchMap on the authState observable in AngularFire2. If the user is not already saved the database, we crate a new User with the default reader role. Once we have the standard auth data from Firebase, we set it to a BehaviorSubject that can be observed throughout the application.
import { Injectable } from '@angular/core'; |
Creating Authorization rules
In this example, authorization rules are defined in the PostService, however, you might consider defining them in their own dedicated service if they are used extensively throughout your Angular app. The service retrieves the user’s roles from Firebase, then maps them to an array that looks like ['reader', 'author'].
Here’s how a basic rule looks. This can be used to (1) hide elements in the HTML (2) prevent actions for firing.
Authorization Rule Example
A rules defines all the allowed roles, then returns a boolean. We also create a helper that uses Lodash to determine if allowed roles match any of the user’s roles.
/// the rule |
Authorization Rule used in HTML
A simple way to prevent action from taking place is to hide the HTML element that uses it. For example, if we have button that will edit a post, we can simply remove it from the DOM with *ngIf.
<button *ngIf="postService.canEdit" (click)="editPost()"> |
Authorization Rule used in TypeScript
What if you want to keep the button in the DOM? To prevent an action in TypeScript, you can use the rule with an if statement.
editPost(post, newData) { |
Full post.service.ts
Here’s the full Angular service code and role-based authorization logic.
import { Injectable } from '@angular/core'; |
Role-Based Router Guards
Another method of securing data on the frontend is to block routes based on the user’s role. We can do this by subscribing to our user BehaviorSubject from the auth service, then mapping the corresponding authorization role to a boolean.
author.guard.ts
Generate a guard with the Angular CLI by running ng g guard author. This guard will block any route that is only intended for users with the author role.
import { Injectable } from '@angular/core'; |
You could use this same logic to create a separate guard for each role or use-case.
app.routing.module.ts
You can use the guard by adding it to the canActivate array.
const routes: Routes = [ |
Role-Based Firebase Database rules
The last consideration, and possibly most important, is to secure the backend with Firebase database rules. If this is a new topic to you, I recommend watching my Firebase Database Rules Tutorial.
The rules below will allow the reader role to read data from the database, the author role to edit (but not delete), and the admin role to have full write access to the posts.
database.rules.json
{ |
The End
That’s it for Firebase Role-Based Auth. Please let me know what you think in the comments or via the Slack team.