
You have unlimited access as a PRO member
You are receiving a free preview of 3 lessons
Your free preview as expired - please upgrade to PRO
Contents
Recent Posts

- Object Oriented Programming With TypeScript
- Angular Elements Advanced Techniques
- TypeScript - the Basics
- The Real State of JavaScript 2018
- Cloud Scheduler for Firebase Functions
- Testing Firestore Security Rules With the Emulator
- How to Use Git and Github
- Infinite Virtual Scroll With the Angular CDK
- Build a Group Chat With Firestore
- Async Await Pro Tips
Server Side Rendering Firebase Angular Universal
Episode 99 written by Jeff Delaney
Update! Watch the latest SSR video and get the most up-to-date code by watching Angular Universal SSR with Cloud Functions on Fireship.io
Full source code AngularFire2 Universal Demo.
I am thrilled to finally bring you a server-side rendering (SSR) tutorial with AngularFire2. This has been a highly requested topic, but in the past there were compatibility issues between Angular Universal and the Firebase Web SDK. As of angularfire2 v5.0.0-rc.7, we are able to combine these two powerful tools into reliable Search Engine Optimization solution for Angular-Firebase apps.
Give James Daniels from Firebase some props for making this possible in AngularFire2 - it was no easy task.
Updates for Angular v6.0
This article as originally released using Angular 5.2. Version 6 introduced some breaking changes to the process, so I have updated the article to cover both versions.
When to use Server Side Rendering
What is server-side rendering? It is a technique that parses your frontend app to HTML on a server (NodeJS), as opposed to the normal process of rendering on the browser.
SSR adds additional complexity and mental boilerplate to your project. Before configuring Angular Universal, ask yourself Do I really need to render on the server? There are two main use cases:
- Search Engine Optimization (SEO)
- Social Media Linkbot Previews
If you need your pages and deep links to be reliably indexed on search engines, SSR may be essential because most search engines do not parse complex JavaScript apps very well. They want plain HTML and that’s what SSR delivers.
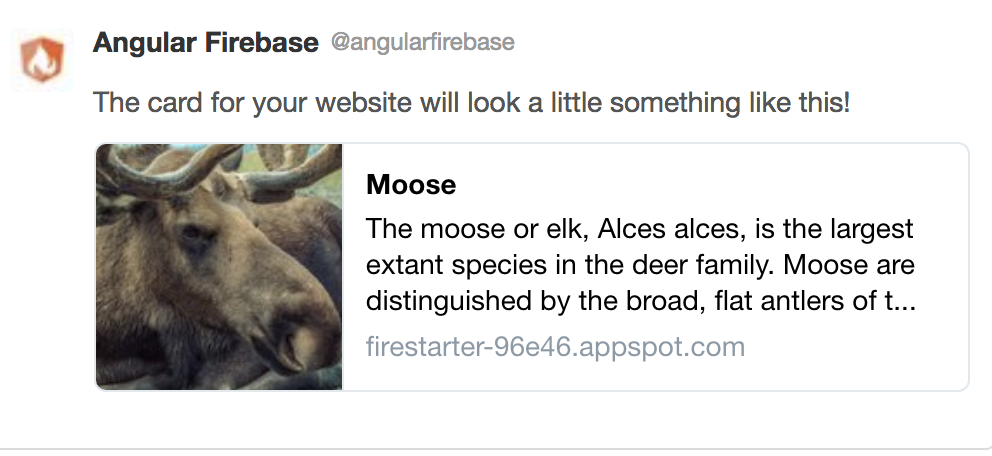
If your content will be shared on social media, SSR may be essential because all link bots - Twitter, Facebook, Slack, etc - will not parse JavaScript, so only the meta tags on your index.html file will be rendered.
Universal vs Rendertron
A few months ago I introduced an SSR alternative that uses Rendertron to parse pages with headless Chrome. These SEO strategies are mutually exclusive, so let’s quickly compare them.
Rendertron is…
- easier to setup
- significantly slower at rendering
Angular Universal is…
- difficult to setup by comparison
- can be highly performant
vides more control and reliability
AngularFire2 + Angular Universal Step-by-Step
In the following section I will walk you through every step required to get up and running with Angular Universal. Yes, there are a ton of steps, but they are all relatively standardized and simple on an individual basis.
Part One - Build an App
In part one we will build an app that that generate metatags dynamically with data saved in Cloud Firestore.
Step 1 - Install Dependencies
First, install the Angular CLI
npm install @angular/cli@latest -g |
Generate a new app with the CLI, making sure to include the router.
ng new awesomeApp --routing |
Install firebase and AngularFire. Follow the official AngularFire2 install steps, but make sure you install the latest release.
npm install firebase angularfire2@next -s |
And some dependencies for Angular Universal:
npm install @angular/platform-server @nguniversal/module-map-ngfactory-loader ts-loader -s |
Step 2 - Create an SEO Service for MetaTags
ng g service seo -m app |
The next step is to generate the title and metatags dynamically for various routes in the app. If you do this in more than one component you will likely want the logic extracted to a service. Unfortunately, Angular cannot update meta tags in bulk, so we need to call updateTag a bunch of times to update tags between route changes.
import { Injectable } from '@angular/core'; |
Step 2 - Create a Routed Component
Now we need something to render. In this demo I have an individual animal detail page, which is where the SEO optimizations will take place.
ng g component animal-detail |
Add the component to the app.routing.module, and give it a route param of :name. This param should be the document ID in Firestore.
const routes: Routes = [ |
Now we need some data to bulid these meta tags dynamically.
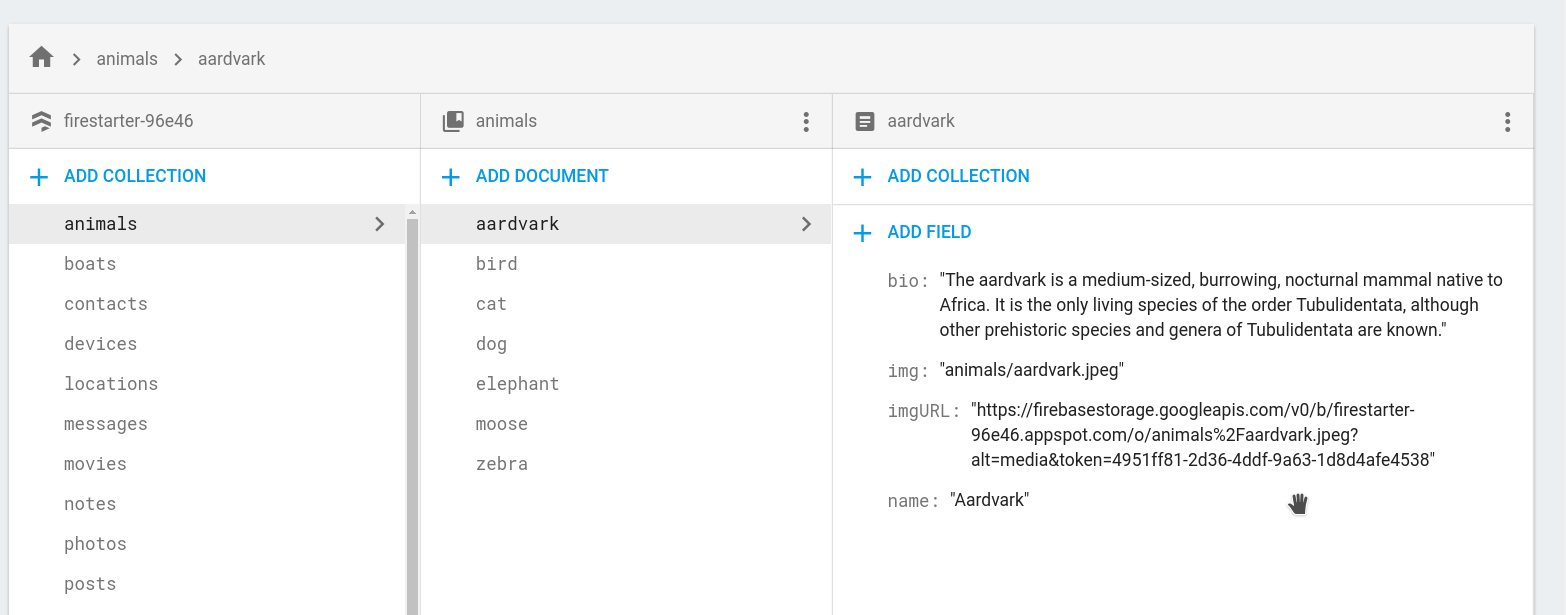
In the component, we will grab the route name param to query some document in Firestore to use for the metatags.
({...}) |
Step 2 ½ - Transfering State
Our component works, but it results in a split-second flash when the app transitions from server to browser. Why? The browser app does not know the app’s data state. So data from Firebase or any HTTP calls will be re-requested after the transfer. Fortunately, Angular Universal has a TransferState class allow the two apps to communicate.
It works by allowing you to set a key-value pair on the server, then read it after the browser transition. Because we’re dealing with an Observable, we can pipe in the startWith operator to avoid the initial null state that causes the flash.
import { tap, startWith } from 'rxjs/operators'; |
And one final thing… If you’re performing state transfer, update the main.ts file to listen for DOMContentLoaded before bootstraping the browser app.
document.addEventListener('DOMContentLoaded', () => { |
Part Two - Angular Universal 6.x
If using Angular 6.x follow the steps outlined in the step-by-step snippet.
Alternatively, you can look into the Angular Universal Prerendering strategy.
Part Two - Angular Universal 5.x
At this point we have our app in place - now it’s server configuration time.
Step 4 - Setup the Server to Browser NgModules
Add withServerTransition to your app.module.ts.
// src/app/app.module.ts |
Create src/app/app.server.module
import { NgModule } from '@angular/core'; |
Step 5 - Create the Main Server Entrypoint
Now we need the main entry point for the server rendered app. Create src/main.server.ts.
export { AppServerModule } from './app/app.server.module'; |
And give it a TS config. Notice how we’re transpiling to commonJS for Node.
Create src/tsconfig.server.json
{ |
Step 6 - Add the CLI App Config
Make one small change to the existing app config, then add an additional CLI config object for the server app. angular-cli.json
"apps": |
Step 7 - ExpressJS
Firebase uses several packages on the server that are not available by default. In my case, I needed to install the following packages.
npm i xmlhttprequest ws -s |
The code below is the ExpressJS server that renders and serves the app. In a nutshell, it reads Angular’s JavaScript from the dist/server build sends a response as HTML - exactly what bots and search engines want to see.
Create server.ts in the project root.
// These are important and needed before anything else |
That’s a lot of code, but it is the standard universal example. There are only a few unique lines for Firebase, which prevent web sockets and XMLHttpRequest from throwing errors in Node.
(global as any).WebSocket = require('ws'); |
Step 8 - Webpack Config
npm i [email protected] -D |
The Angular CLI doesn’t know how to deal with our Express server code, but we can leverage Webpack to transpile TypeScript into the dist folder. In my experience, I had to set the webpack and ts-loader versions to those listed in the commands above (but that may not be necessary in your case).
Create webpack.server.config.js in the project root.
const path = require('path'); |
Step 9 - Build scripts
Let’s now add a few NPM scripts to compile our build efficiently from the command line.
Add these scripts to package.json
"scripts": { |
Now test it out.
npm run build:ssr |
You should see your SSR app available on localhost:4000.
Step 10 - Deploy to your Server
Now we need a NodeJS server to host our site. Since we’re already using Firebase, we can easily deploy to App Engine (but keep in mind that you pay by the hour). In a future lesson, I will show you how to setup Angular Universal on Firebase Cloud Functions to avoid these costs.
Create an app.yaml in the project root.
runtime: nodejs |
You can easily deploy the Node app to App Engine, assuming you have Google Cloud CLI tools installed.
gcloud app deploy |
The End
Congrats, we have solved one of the most challenging feats in Angular Firebase development. Server-side rendering provides a reliable strategy for search engine optimization and linkbot-friendliness, and maybe even some PWA performance gains. Reach out on Slack or in the comments if you run into issues.