You have unlimited access as a PRO member
You are receiving a free preview of 3 lessons
Your free preview as expired - please upgrade to PRO
Contents
Recent Posts

- Object Oriented Programming With TypeScript
- Angular Elements Advanced Techniques
- TypeScript - the Basics
- The Real State of JavaScript 2018
- Cloud Scheduler for Firebase Functions
- Testing Firestore Security Rules With the Emulator
- How to Use Git and Github
- Infinite Virtual Scroll With the Angular CDK
- Build a Group Chat With Firestore
- Async Await Pro Tips
How to Use Google APIs With Firebase Auth
written by Jeff Delaney
For a full Angular example, make sure to watch the AngularFire + Google Calendar Lesson.
Firebase auth is great because we can signup and login users with a single line of code, but it is limited to readonly access on the user’s Google profile. It does NOT provide OAuth2 scopes to other Google services like Calender, Adwords, Drive, GCP, GSuite, and dozens more.
We can overcome this limitation by using Google’s JavaScript API client to authenticate the user with additional scopes, then sign in manually with Firebase.
The snippet below will show you how to wrap Google Web Auth with Firebase to customize the Google APIs you can access on behalf of the user.
This snippet assumes that you already have Firebase initialized in your project with Google OAuth enabled.
Optional - How to use Type Definitions with Google APIs
The google API client library is a big complex collection of tools, so you definitely want them strong typed. There are different type definitions to install for different APIs (some of which don’t work well), but here’s the most basic example.
npm install --save @types/gapi |
Add the types to your tsconfig.json
{ |
Now you can use the types explicitly in one of your app files.
/// <reference path="../../node_modules/@types/gapi/index.d.ts" /> |
Step 1 - Initialize the Google API JavaScript Library
First, we need to make the Google API client available in our application. Add the following script to your HTML document.
<head> |
There are four variables we need to initialize the gapi client.
- apiKey - Project web API Key from the Firebase console
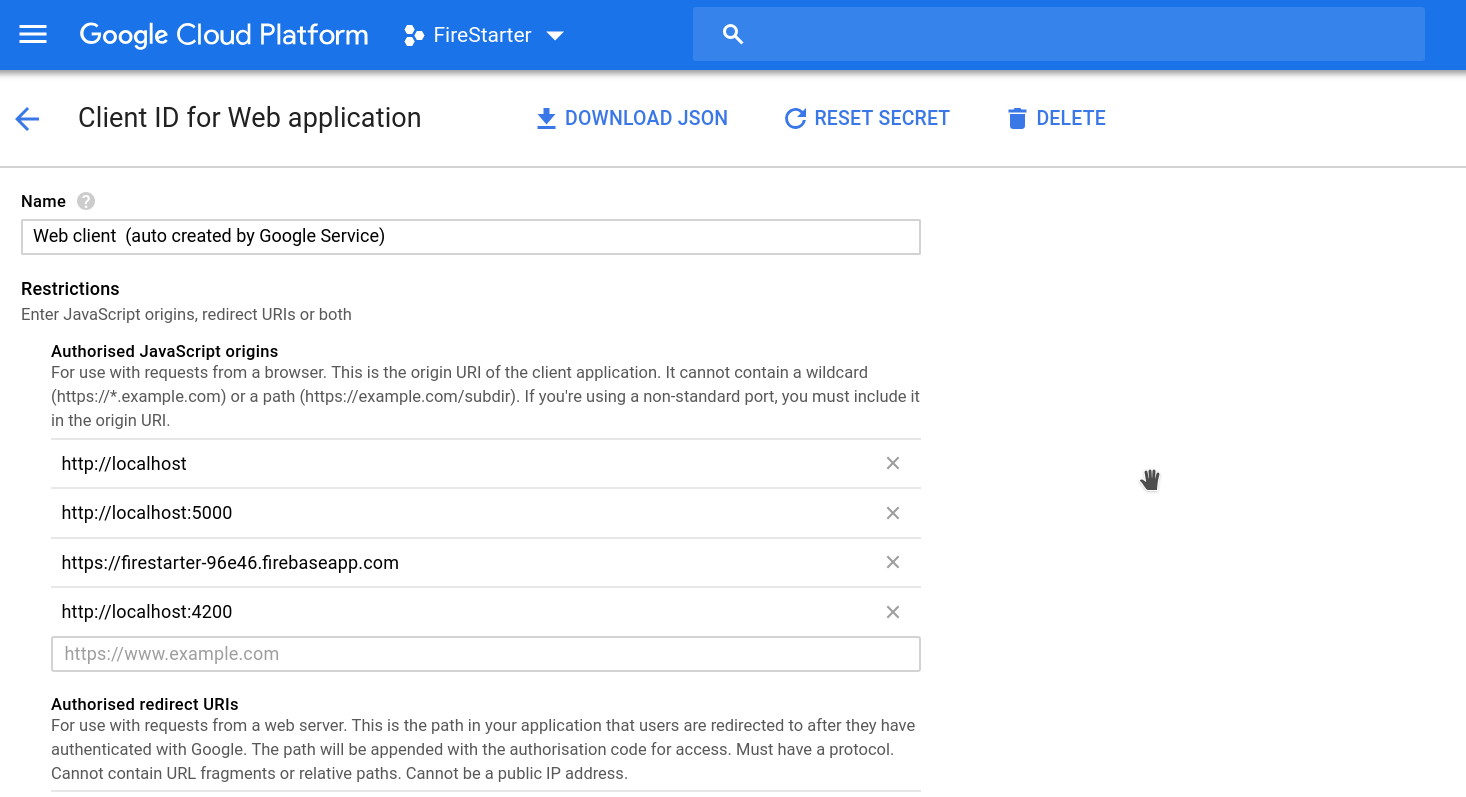
- clientId - Web OAuth 2.0 Client ID found on the GCP Console under API credentials
- discoveryDocs - Discovery doc URL for the API being used.
- scope - The API scopes we want access to. These vary based on the API, but you can get a full listing here.
Now run this script to initialize the client
gapi.load('client', () => { |
You will need to whitelist your localhost port for development on the clientId. This can be done by clicking on the client ID in the GCP console.

Step 2 - Login in the User
A user must be logged in and grant permission for the API scopes you have requested. The user will first login with Google’s Client Library, then we’ll pass off the ID token Firebase.
async login() { |
Firing this method will log the user into Google with a popup window, then manually sign in the user to Firebase with the resulting ID token.
Access Token vs ID Token
A common source of confusion is the difference between an Access Token and an ID Token, both of which are returned when we call googleUser.getAuthResponse().
- The Access Token is a short-lived token used to make authenticated requests to Google APIs.
- The ID Token is JSON Web Token used to identify the user and its auth claims/data.
In our case, we use the ID token to authenticate the user into Firebase. We use the Access Token to make requests to whatever APIs the user gave us access to. Do not save these in your database because they are managed by the SDKs for you automatically.
Step 3 - Make Authenticated Requests to Google APIs
The user is now authenticated and we have an Access Token (you don’t actually need to do anything with it or know its value) that can be used to make API requests. The process will differ based on your API the user gave you permission to, but a basic example with Google calendar looks like this:
const events = await gapi.client.calendar.events.list({ |
Pretty simple, right? That’s because gapi has the current user context and automatically sends the access token to the API. You now have the power to access Google APIs on behalf of your Firebase users - the possibilities are endless.

