You have unlimited access as a PRO member
You are receiving a free preview of 3 lessons
Your free preview as expired - please upgrade to PRO
Contents
Recent Posts

- Object Oriented Programming With TypeScript
- Angular Elements Advanced Techniques
- TypeScript - the Basics
- The Real State of JavaScript 2018
- Cloud Scheduler for Firebase Functions
- Testing Firestore Security Rules With the Emulator
- How to Use Git and Github
- Infinite Virtual Scroll With the Angular CDK
- Build a Group Chat With Firestore
- Async Await Pro Tips
Angular Router Basics
Episode 113 written by Jeff Delaney
Health Check: This lesson was last reviewed on and tested with these packages:
- Angular v6.0.4
Find an issue? Let's fix it
Source code for Angular Router Basics on Github
Routing is a critical UX element for most Angular apps. Your route configuration has a major impact on pageload performance, search engine optimization, security, and the user experience. In this lesson, you will learn all of the core techniques needed to use the Angular effectively.
Let’s start this lesson by generating a brand new Angular app with the CLI:
ng new awesome-app --routing |

Angular Router Fundamentals
In this first section, I will cover the absolute basics of routing and navigation. You can think of the router as a global service that holds information about the state of the URL.
Creating Routes and Navigating
The router will render a component in the <router-outlet></router-outlet> of it’s parent component, which is the app.component by default. Here is the most basic use case.
import { HomeComponent } from './home/home.component'; |
Now setup a link in the HTML that points to this path.
<a routerLink="/home">Home Page!</a> |
Alternatively, you might want to navigate from the a component’s TypeScript. This is useful when you want to change routes after the user signs in without them needing to tap another button.
import { Router } from '@angular/router'; |
Child Routes with Parameters
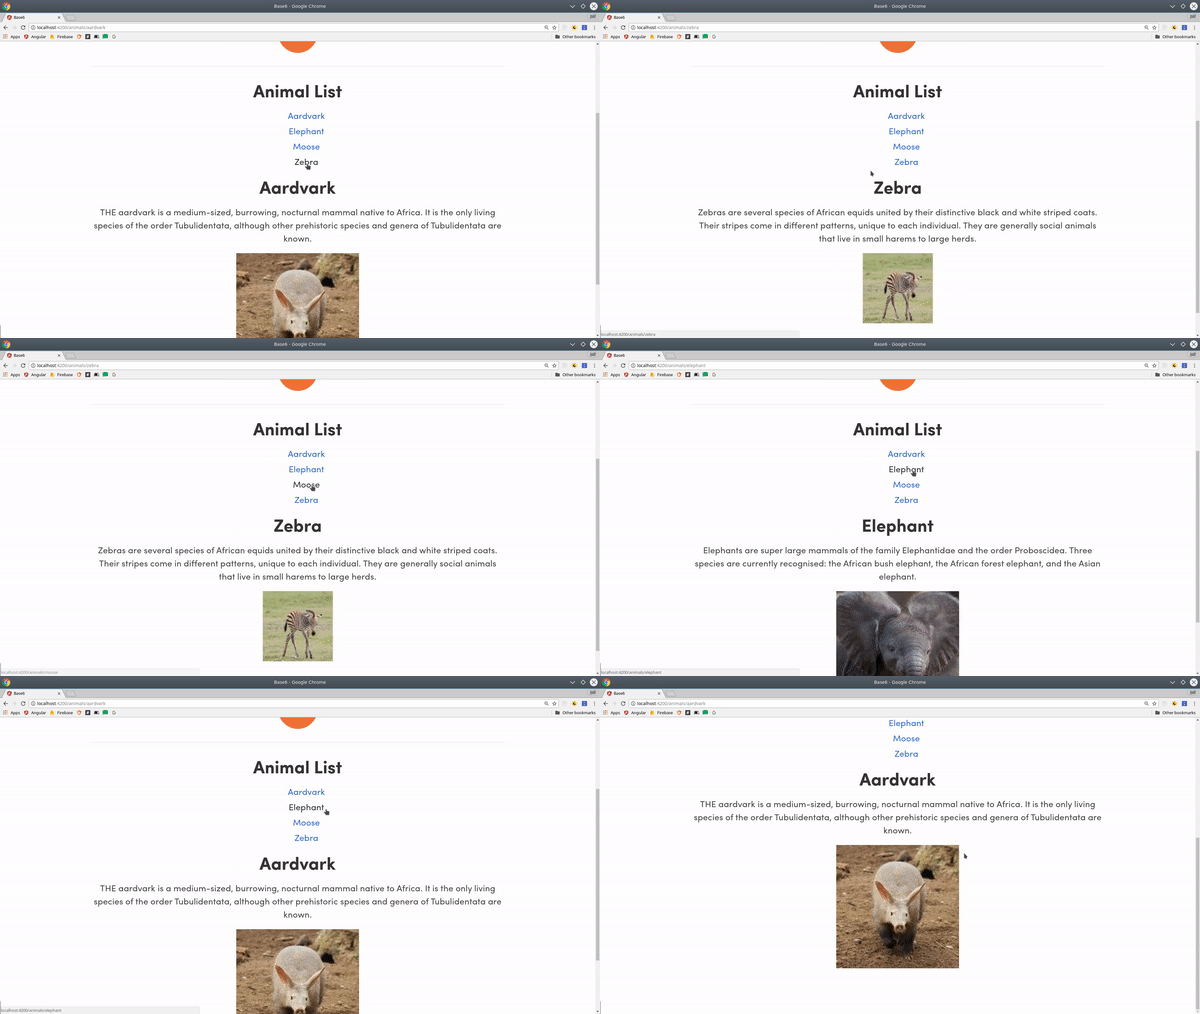
Let’s imagine we have a list of Animals and want to render some details about a specific animal on navigation to /animals/elephant. But our database has thousands of animals, so we need to generate this route dynamically. Adding : to a path segment makes it a dynamic value.
const routes: Routes = [ |
In this case, we can extract the animal’s name or ID from /animals/elephant from the URL segment name.
In the parent component, we would loop over our animal objects from the database and create a router link based on the animal name:
<li *ngFor="let animal of animals$ | async"> |
The child component will be rendered inside the outlet of the parent.
Wildcard Route 404 Page
You can use the ** path as a catchall route to handle non-existent data gracefully. Make sure this is the very last route in the routes array. And definitely use a funny gif on your error page.
const routes: Routes = [{ path: '**', component: ErrorComponent }]; |

Redirect Routes
You don’t have to navigate to a component. Instead, you might want to redirect to an existing route.
const routes: Routes = [ |
Change CSS on the Active Route
Angular makes it easy to change the CSS styling to an actived route. The router has a special property binding routerLinkActive that will apply the specified CSS classes provided on the right side.
<a routerLinkActive="highlight">Some Link</a> |
Then give it a CSS class to make it stand out:
.highlight { |
Guards
A guard is just an injectable Angular service used to control the behavior of certain routes. The three most common user interfaces include:
canActvate- block routes based on a condition, commonly a user’s auth state.canDeactivate- forces user to stay on the route, commonly used prevent loss of unsaved changes on a form.resolve- preload additional data that can be accessed from the route.
CanActivate Example
In this example, we simulate an asynchronous call with a timer of 1s to verify a user is an admin. The canActivate guard will automatically subscribe and use the emitted boolean to block or allow access.
@Injectable({ |
Then apply the guard to the protected routes.
const routes: Routes = [ |
Preload Data with the Router Example
One of the most powerful mechanisms for keeping your code DRY is to preload data with resolve. If you need to query the same data on multiple routes, a resolver can dramatically simplify your code. In the code below, we extract a segment from the route, then return an Observable that fetches the data asynchronously.
@Injectable({ |
All routes with the specified resolver will have their data accessible when the component is initialized.
const routes: Routes = [ |
You can then access the data as an Observable from the component. Much cleaner than repeating the same data-fetching code in multiple components.
import { ActivatedRoute } from '@angular/router'; |
Lazy Loaded Routes
Lazy loading is a critical design pattern for progressive web apps because it allows you break your app’s JS bundles into chunks with code splitting, thus increasing initial page load performance.
If you have a poor app performance due to a massive main.js bundle, you will very likely need to use lazy loading, but don’t worry, it’s easy and I covered it in detail back in episode 23, which has been fully updated to work with Angular 6.

