You have unlimited access as a PRO member
You are receiving a free preview of 3 lessons
Your free preview as expired - please upgrade to PRO
Contents
Recent Posts

- Object Oriented Programming With TypeScript
- Angular Elements Advanced Techniques
- TypeScript - the Basics
- The Real State of JavaScript 2018
- Cloud Scheduler for Firebase Functions
- Testing Firestore Security Rules With the Emulator
- How to Use Git and Github
- Infinite Virtual Scroll With the Angular CDK
- Build a Group Chat With Firestore
- Async Await Pro Tips
Dialogflow With Firebase Cloud Functions and Firestore
Episode 59 written by Jeff Delaney
In my previous Angular Chatbot lesson, I showed you how to build a basic conversation experience with Dialogflow. This lesson is going to expand on that concept by building a bot that can run backend code with Firebase Cloud Functions in response to the conversation. This allows you to easily do things like:
- Update the database.
- Generate files (pdf, images, etc).
- Retrieve data from a 3rd party API.
Here’s an example of how the process works.
- User says “Hey bot, can you email me the latest report?”
- Bot recognizes build report intent
- Bot triggers a cloud function that queries the database, generates a PDF, and sends an email.
- Bot responds “No problemo, I just emailed you the latest report”.
Firebase Cloud Functions with Dialogflow Introduction
Dialogflow has build in support for Firebase Cloud Functions - an extremely powerful integration if you’re already developing with Firebase. This means you don’t have to deal with webhooks and can write code that is tightly integrated with your current project.
What we’re Building
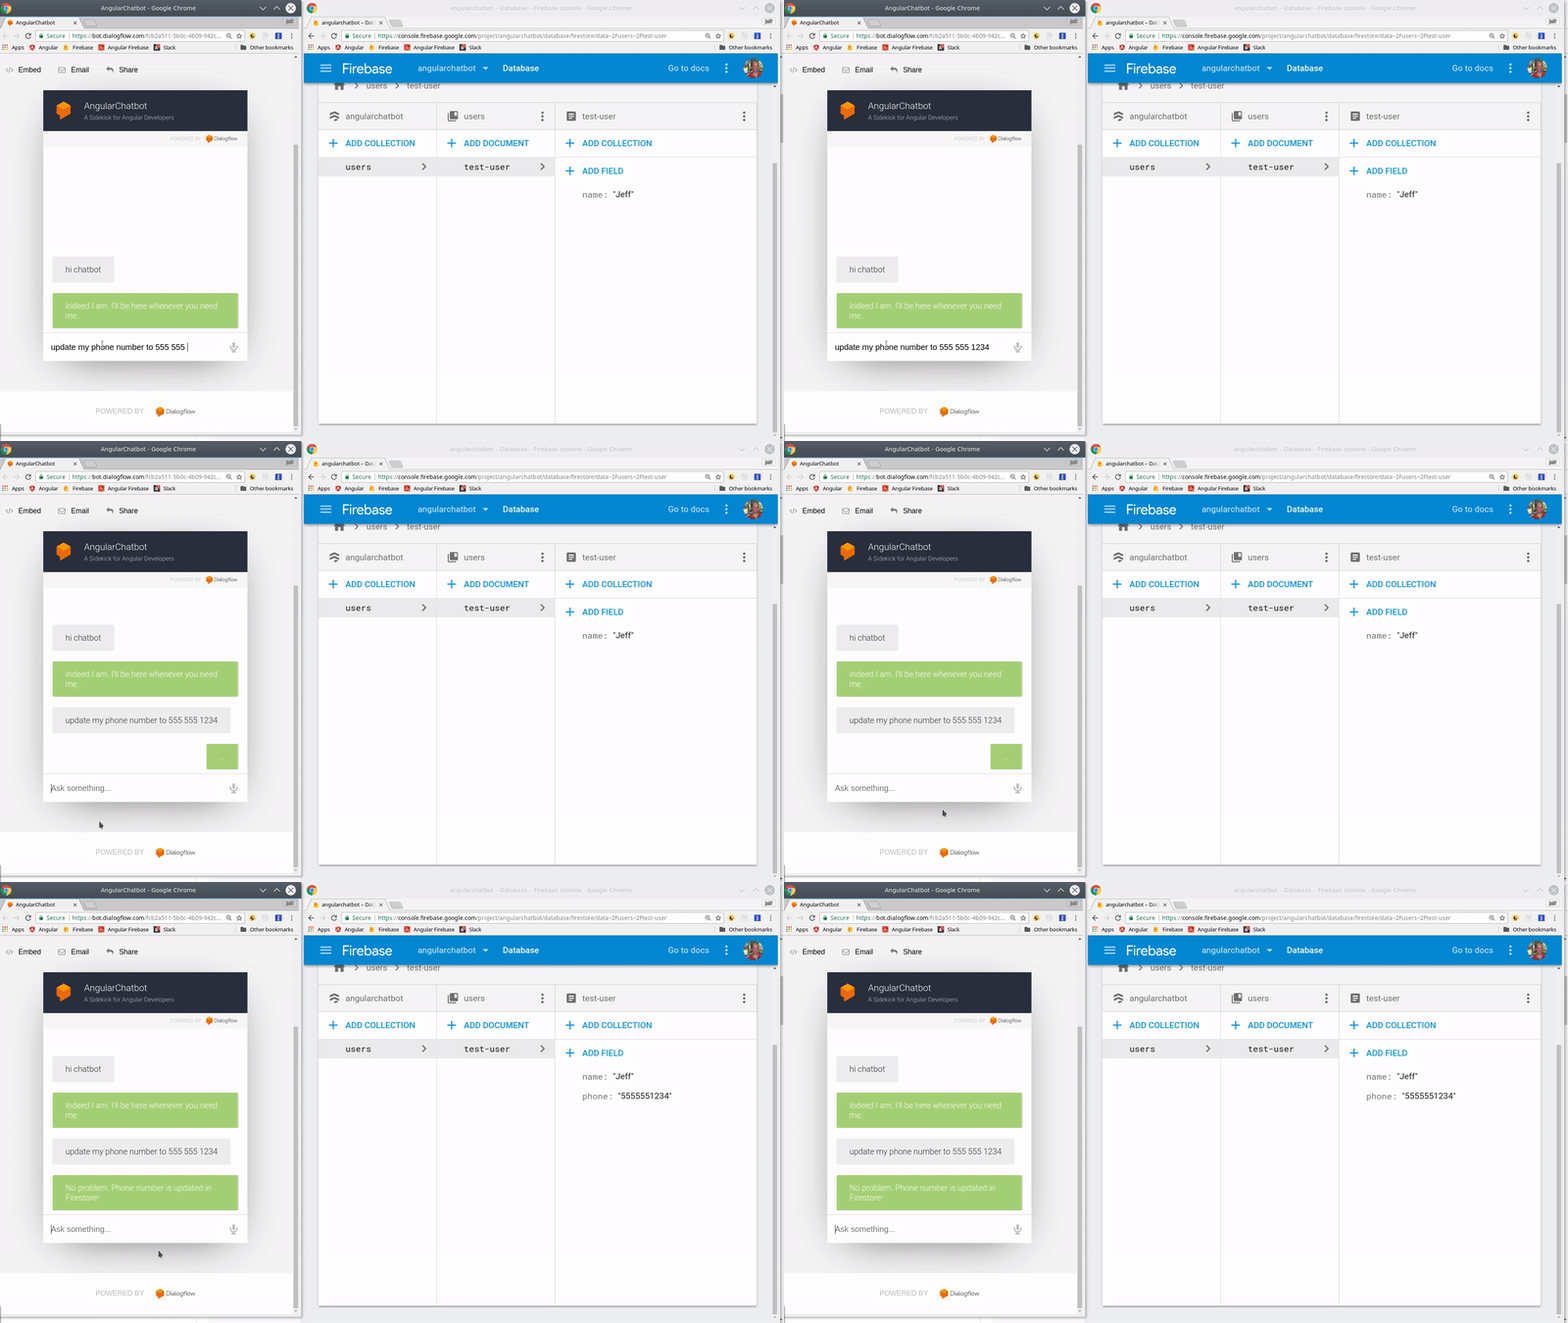
I have a users collection in the Firestore database and each user document has a phone number. The bot will detect the update phone number intent, then take the users input and save it to Firestore.

Where do you define dialogflow functions?
You can also have the option to write code directly in the browser console. However, you do not have access to your Firebase environment variables. If you want to connect other Firebase resources, such as Firestore database, you need to deploy your functions from the CLI.
If you’re starting with cloud functions from scratch, use the following commands to add them to your current Firebase project.
npm install -g firebase-tools |
Building the Chatbot
We need our chatbot to detect a specific substring in user’s statement. For example, if the user says “Hey bot, update my phone number to 555 555 1234” - the bot knows to only to extract only the number and save it to the database.
Create the Dialog Flow Intent
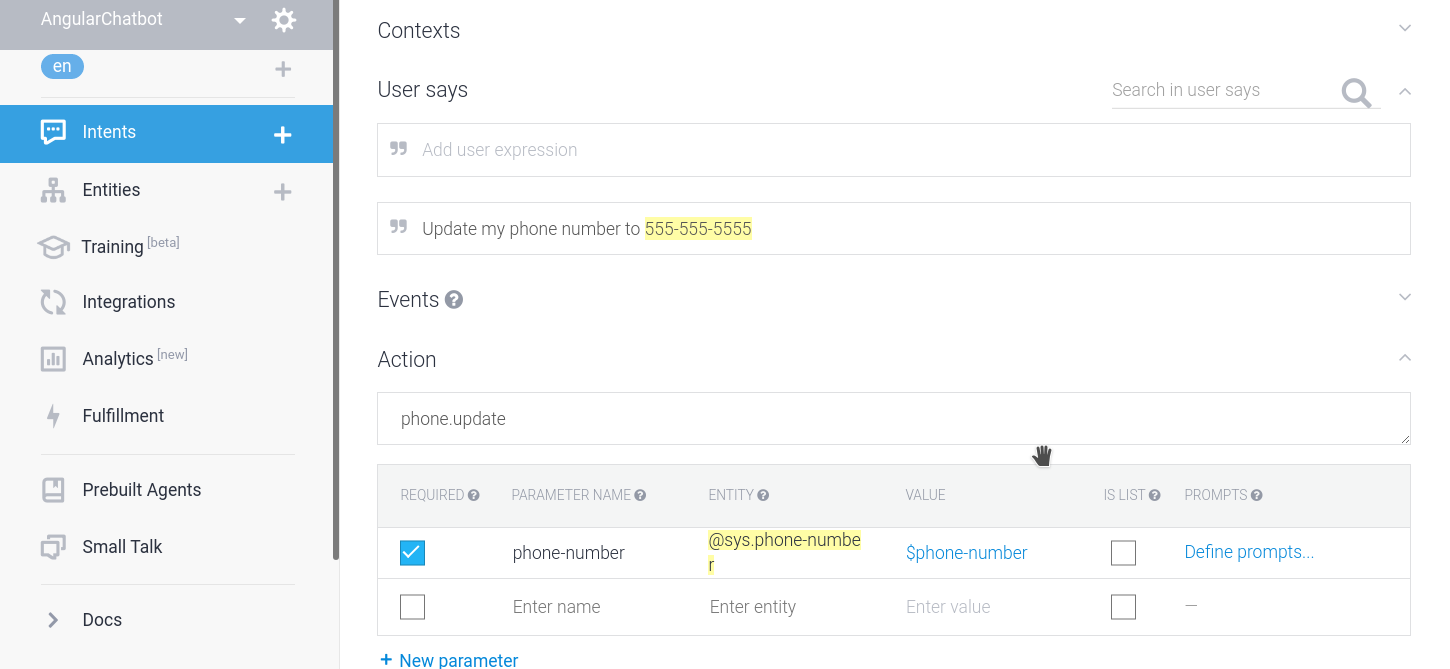
First we need to create the intent on the agent. Dialogflow will automatically recognize the phone number when you type it, then save it as parameter. It does this for a number of common-use cases, such as geographical locations, email addresses, etc. You can also create your own custom entities to capture parameters that are specific you app’s needs.
Make sure to set the action as phone.update. The function will look for this action type and run code in response to it.

Building the Cloud Function
The cloud function documentation for dialogflow is overly complex. My goal is to show you a bare-minimum function that you can build upon with your own integrations.
package.json
We only need the default packages that are initialized with Firebase functions. If you are using an existing project, make sure you packages are up-to-date for use with the Firestore NoSQL Database.
{ |
index.js
What we have here is an HTTP cloud function that will (1) receive and parse the request payload from Dialogflow, (2) update the Firestore database with the phone number, and (3) send the response data back Dialogflow.
The actionHandlers is the important part here. It is an object of functions, where the key corresponds to the action name you defined in the intent screen Dialogflow. We can then use the action variable to call any function inside this object.
Lastly, the formatResponse helper is used to format the response data that will be shown to the end user. It this example, we just send a text response, but I included all other options so you have that as a reference.
const functions = require('firebase-functions'); |
const functions = require('firebase-functions'); |
Deploy the Function
Now we can deploy the function from the command line.
firebase deploy --only functions |
This should return a URL that looks like this.https://us-central1-yourproject.cloudfunctions.net/dialogflowFirebaseFulfillment
Enable Webhooks
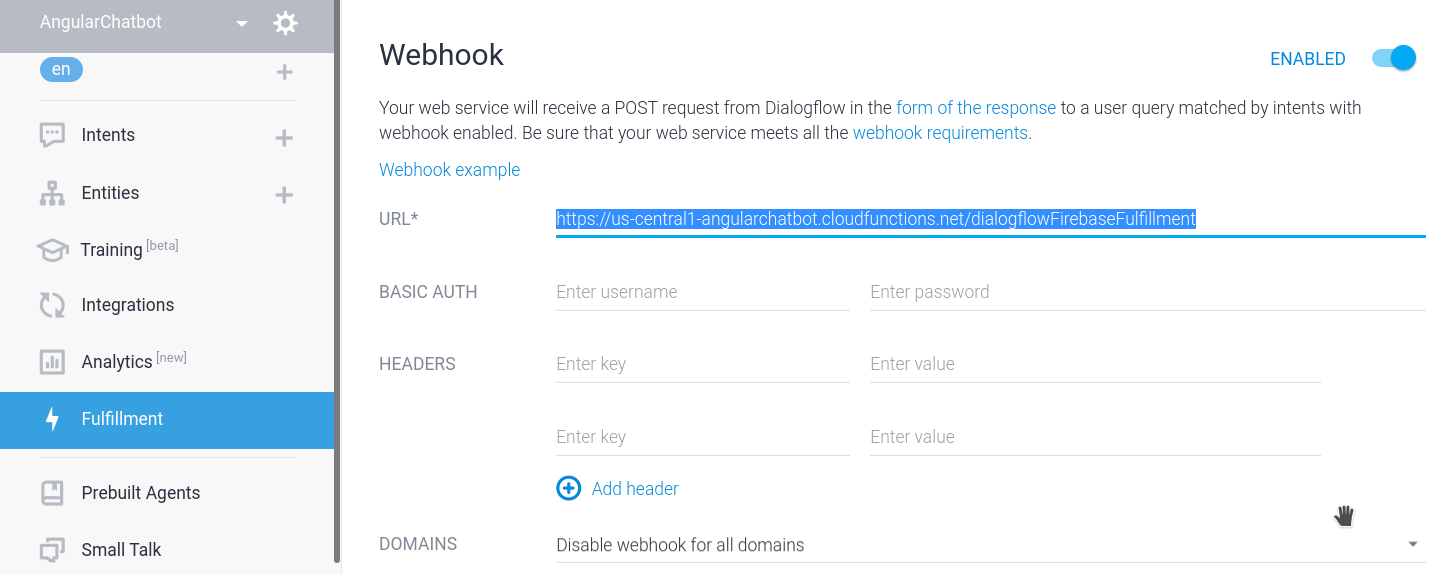
The final step is to tell Dialogflow to use this Cloud Function Endpoint for webhooks in the fulfillment panel. Simply copy and paste cloud function URL as the dialogflow webhook URL.

Then we go back into the intent and tell it to use webhooks down at the bottom. Checking this box tells dialog flow to use the cloud function to generate data, as opposed to sending a static text response.

The End
Your chatbot is now has the power to access the full suite of Firebase resources and beyond.

