You have unlimited access as a PRO member
You are receiving a free preview of 3 lessons
Your free preview as expired - please upgrade to PRO
Contents
Recent Posts

- Object Oriented Programming With TypeScript
- Angular Elements Advanced Techniques
- TypeScript - the Basics
- The Real State of JavaScript 2018
- Cloud Scheduler for Firebase Functions
- Testing Firestore Security Rules With the Emulator
- How to Use Git and Github
- Infinite Virtual Scroll With the Angular CDK
- Build a Group Chat With Firestore
- Async Await Pro Tips
Google Calendar API With Firebase
Episode 138 written by Jeff Delaney
Health Check: This lesson was last reviewed on and tested with these packages:
- Angular v6
- RxJS v6.2
- CalendarAPI v3
- @angular/fire v5
Find an issue? Let's fix it
Source code for Google Calendar API With Firebase on Github
I use Google Calendar almost every single day and really appreciate apps that can coordinate important events for me automatically. Today, we’ll learn how to integrate Google’s JavaScript API client with Firebase to make authenticated requests to the Calendar API on the behalf of our users. This article was inspired by the real-world requirements of a Broadway Life, a tour company in NYC and needs to perform full CRUD operations on their clients’ calender.

Not using AngularFire? How to Use Google APIs with Firebase Auth for the Firebase SDK and vanilla JS instructions.
Initial Setup
The following guide assumes you’re working from an Angular app with Firebase and AngularFire installed.
Google APIs are RESTful and can be accessed with the Google API Client Libraries, or gapi for short. By default, Firebase gives us read-only access the user’s Google+ account and nothing else, so that leaves us with two main options when working with additional Google APIs in Firebase.
Option A - Authenticate with gapi, then login to Firebase manually with the resulting ID token (JSON web token). This requires us to include an extra JS script, but it will manage access tokens automatically.
Option B - Login with with the Firebase GoogleAuthProvider and add additional scopes. This will grant us permission, but we will need to manage access and refresh tokens manually.
We will be using Option A in ths guide and it is likely the better option if making frequent requests to Google APIs.
Add the Script Google APIs Tag
First, add the gapi script tag to the head of your index.html to make it globally available.
<head> |
Authenticate with the Calender API Scope
The following section will (1) initialize the gapi client (2) login the user with the permission to manage their calendar.
ng generate service auth |
Initialize gapi
I repeat, we will use gapi for the initial login then pass the JWT back to Firebase. From the user’s perspective the login process is identical, we just need to make sure to add the proper API keys and scopes.
A scope is like a “security clearance” the user grants to your app. Every API defines a unique set of scopes and you should only request the bare minimum of what your app needs.
The code below defines our AngularFire user$ Observable and initializes the API client.
import { Injectable } from '@angular/core'; |
You might have noticed that we opted-out of TypeScript for gapi. This is not ideal, but it is possible to install community-maintained types for gapi.
Login with Google, then Firebase Manually
The method below uses gapi to trigger the login popup window. After the user is logged in,we take the JWT and pass it Firebase. Now we have an logged-in Firebase and access to manage their calender events.
async login() { |
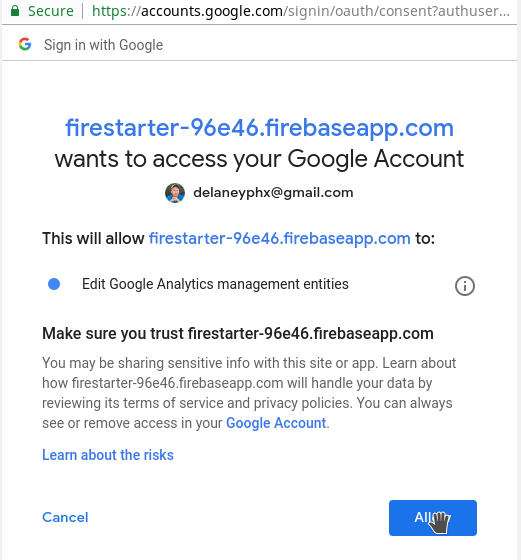
When the user logs in for the first time, you should see a consent screen that looks something like this. Make sure it includes the additional scopes you specified.

Using the Calendar API
All of the authentication logic is done. Now we just need to use gapi to make requests to the calendar API. You can find out which methods are available in the Google API reference and the Calendar API reference.
Retrieve Calendar Events
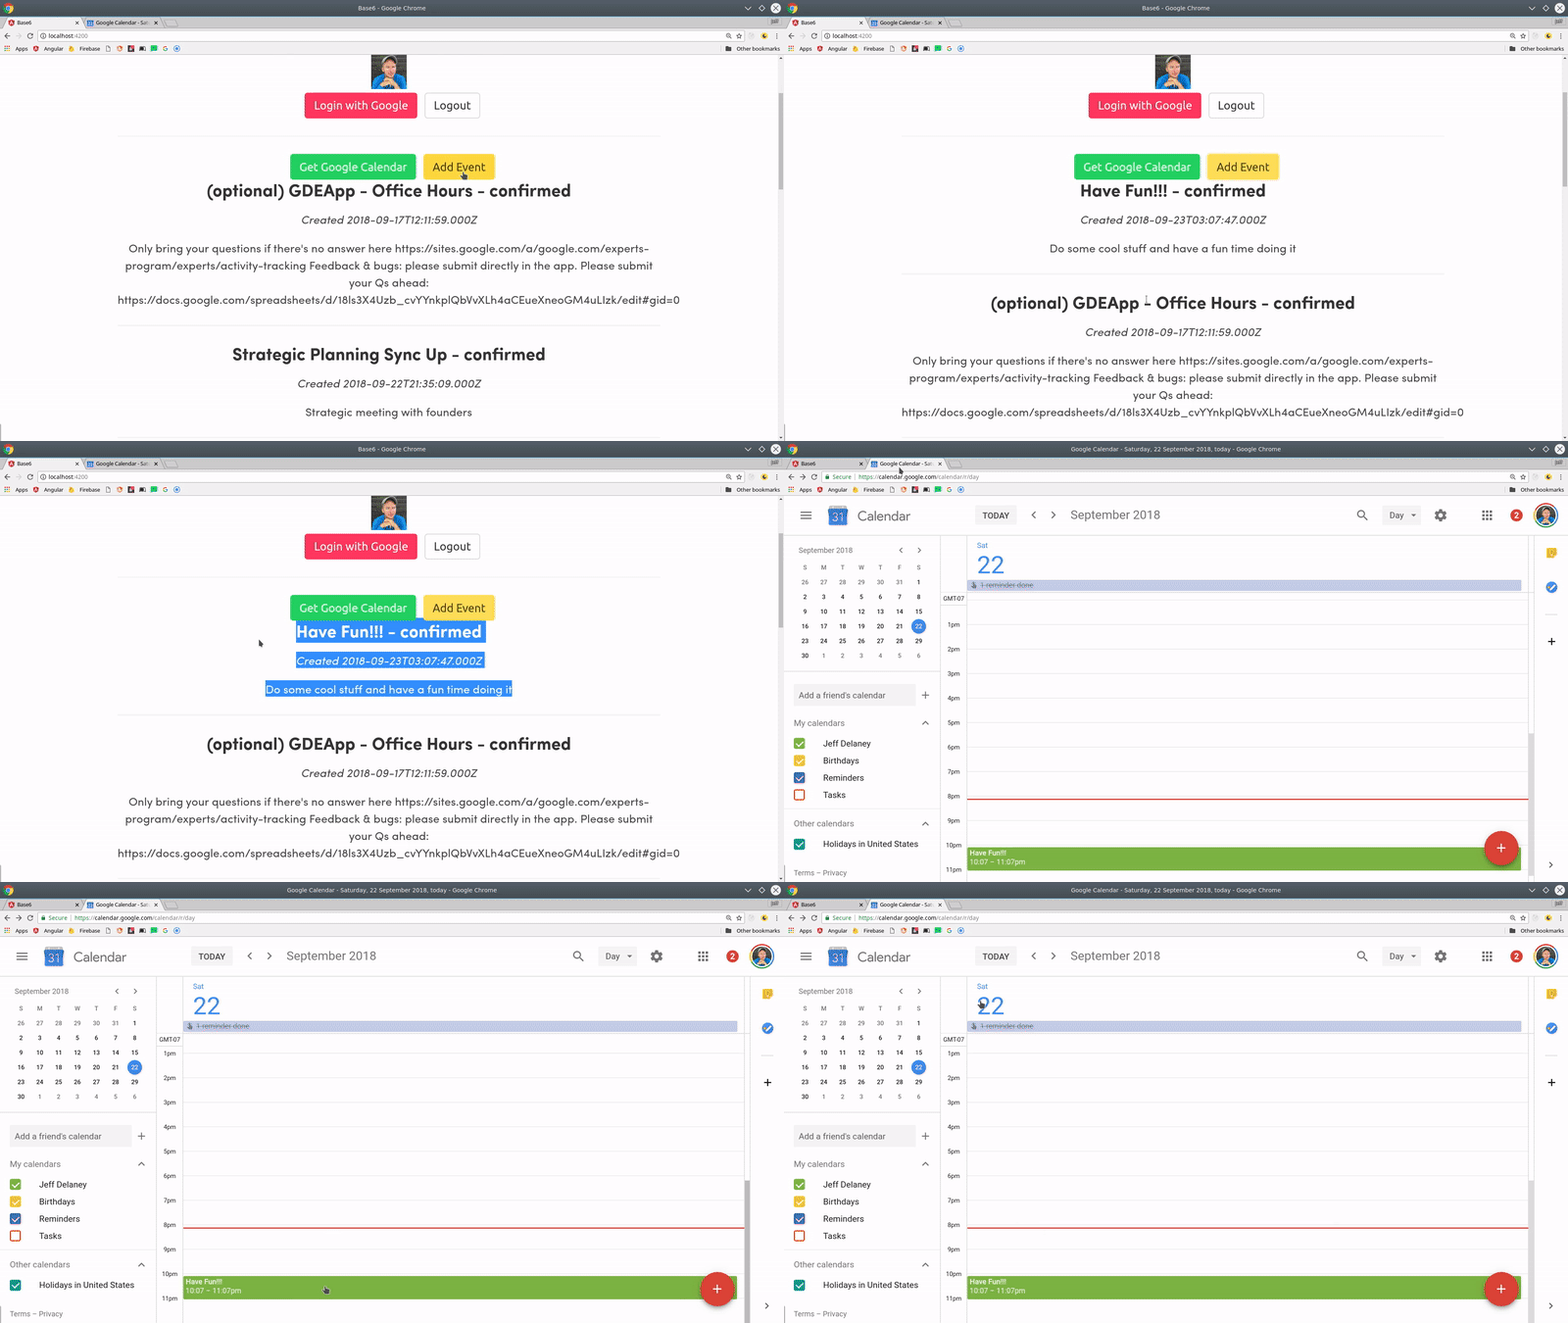
The first request is for the last 10 calendar events scheduled in the future. We can set the result as a property on the service to share it across multiple components if necessary.
async getCalendar() { |
Create or Update Calendar Events
Adding a new event is just as easy - it’s really just a matter of adding the necessary values to the request, then awaiting the response.
async insertEvent() { |
Using the Service
The final step is to put the the service to use in an Angular component.
Step One - Inject the Service
Inject the service into any component that needs it.
import { Component } from '@angular/core'; |
Step Two - Bind the Data
Call the login method from the component, unwrap the user Observable, and bind the data the HTML.
<div *ngIf="auth.user$ | async as user"> |
The End
The Google Calendar API is great, but there is a far more powerful element to this lesson - you now have a foundation for using any of the hundreds of APIs that live in the Google ecosystem. Many these APIs are essential for building B2B software products that manage a user’s resources on tools like Adwords, Analytics, GSuite, Maps, GCP, and more.

