You have unlimited access as a PRO member
You are receiving a free preview of 3 lessons
Your free preview as expired - please upgrade to PRO
Contents
Recent Posts

- Object Oriented Programming With TypeScript
- Angular Elements Advanced Techniques
- TypeScript - the Basics
- The Real State of JavaScript 2018
- Cloud Scheduler for Firebase Functions
- Testing Firestore Security Rules With the Emulator
- How to Use Git and Github
- Infinite Virtual Scroll With the Angular CDK
- Build a Group Chat With Firestore
- Async Await Pro Tips
How to Structure a Large JavaScript Project
Episode 136 written by Jeff Delaney
Source code for How to Structure a Large JavaScript Project on Github
The right project structure for your app depends primarily on (1) its complexity, and (2) the size of your team. In this lesson, I will show you how to organize and share code in a big JavaScript project that contains multiple apps.
Monorepos versus Multiple Repos
There are two high-level strategies for handling source control in a large complex web application - monorepo and multiple repos. Some developers have very strong preferences for one or the other, but it mostly just boils down to a series of tradeoffs.
A monorepo is a single git repository that synchronizes multiple packages. This pattern has become very popular with large organizations, like Google and Facebook, and is well suited large teams. Multiple repos are, well, exactly like they sound - multiple isolated repos maintained as individual packages.
There are pros and cons to both strategies, so let’s examine some of the tradeoffs.
- Monorepos are big and complex, usually requiring a tool like Lerna or Nx.
- Multiple repos are less complex on the surface, but might become chaotic if you have many projects and/or contributors.
- Monorepos have long testing & deployment CI/CD pipelines.
- Monorepos share a git timeline, which makes reverting commits on a single package difficult.
Because I’m working on this project as an indie developer and only have a few apps, I will go with the multiple repos strategy. In either case, sharing code follows the same basic process.
Code Sharing in Large Projects
The ultimate goal of any project structure is to maximize code reusability. Do Not Repeat Yourself.
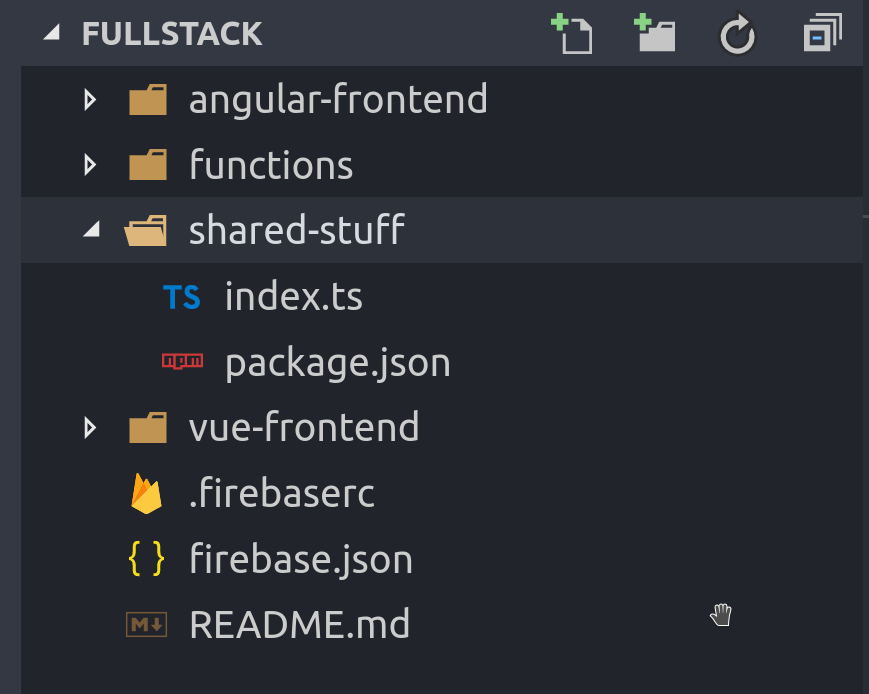
It’s very common to share code like TypeScript interfaces and business logic between multiple projects. The beauty of building a fullstack JavaScript app is that code can easily reused on both the frontend and the server. Let’s quickly bootstrap a complex JS project using the CLI tools for Angular, Vue, and Firebase.
mkdir big-app |
And just like that we now have a fullstack multi-app project.
Share TypeScript Interfaces between Apps
Take for example this very common scenario - you have an Angular frontend written in TypeScript, then you want to share its interfaces with your NodeJS backend. You might have a file in Angular at src/app/user.model.ts:
export interface User { |
How can your backend Node code use this interface? Well, it can’t when it lives in your frontend Angular code. You could just copy-and-paste it over the server code, but that does not scale very well. In the next section, we’ll share this interface by creating an NPM package from scratch.

Create a Shared NPM Package
Let’s expand our workspace with another package (or library) that is specifically for sharing code and typings.
mkdir shared-stuff |
We now have the basic outline for a shared library.

At this point, we can add our shared code and/or interfaces to the index file. This code can be consumed by other apps in the project after we package it. Let’s add typings and a build script to the package.json
{ |
We can build this package and install it in our shared apps.
cd shared-stuff |
import { User } from 'shared-stuff'; |
If you have many shared libs, it is well-worth the investment to setup an NPM organization to scope packages to your company @awesomeinc/shared-stuff and install them remotely.
Sharing a Local NPM Package with Cloud Functions
Cloud Functions are deployed to a remote serverless server, so we need a way for functions environment to access the source code. You have three options:
- Publish your library publicly on NPM.
- Publish it privately by creating an NPM organization.
- Package it up, then install it from the functions directory.
The third option makes the most sense in the early stages of development, so let’s look at that process.
In the shared lib, update the build command to zip the library after building.
{ |
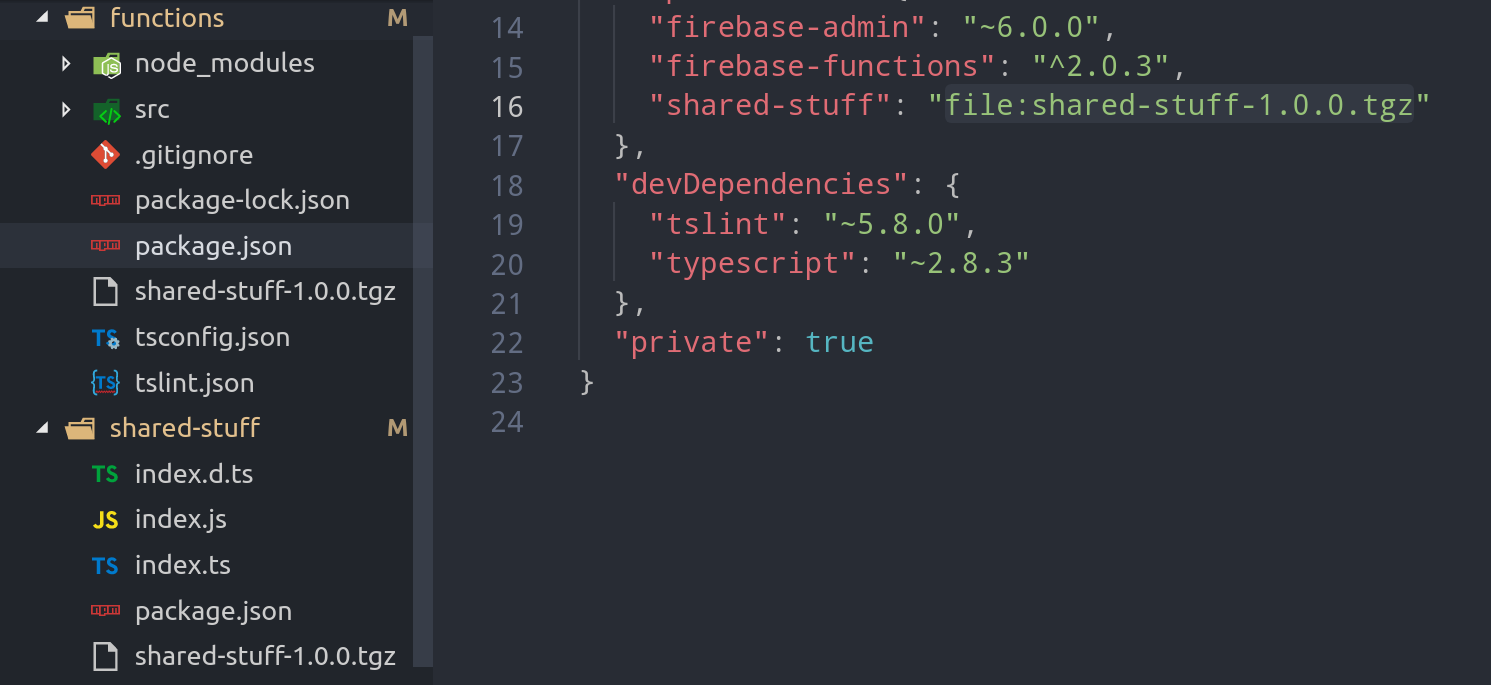
This will give us a tarball that looks like shared-stuff-1.0.0.tgz that we needs to be copied over the functions dir, then installed from the path in the functions dir. When you deploy, the contents of the functions directory will be included in the deployed bundle.
cd shared-stuff |
The relationship between your shared lib and functions should look something like this:


