You have unlimited access as a PRO member
You are receiving a free preview of 3 lessons
Your free preview as expired - please upgrade to PRO
Contents
Recent Posts

- Object Oriented Programming With TypeScript
- Angular Elements Advanced Techniques
- TypeScript - the Basics
- The Real State of JavaScript 2018
- Cloud Scheduler for Firebase Functions
- Testing Firestore Security Rules With the Emulator
- How to Use Git and Github
- Infinite Virtual Scroll With the Angular CDK
- Build a Group Chat With Firestore
- Async Await Pro Tips
Payment Request API With Stripe Elements
Episode 81 written by Jeff Delaney
Update! Watch the latest video and get the most up-to-date code by enrolling in the Stripe Payments Master Course on Fireship.io
The Payment Request API is poised to replace traditional checkout forms in progressive web apps. This is great news both for customers and developers. The customer doesn’t have to deal with filling out long annoying forms, the developer doesn’t have to build them.
In this lesson, I will show you how to leverage this feature in your PWA with a Stripe Elements Payment Request. Not only will it mount a payment request button in Chrome, but it will also mount an Apple Pay button in Safari (as long as you register your domain).
The Payment Request API has limited support as of early 2018 - just Chrome Desktop, Android, and MS Edge. Stripe elements will also work seamlessly with Apple Pay on safari browsers, but you will need to register your domain with Apple (although this is not technically part of the payment request API) .
Full source code for Angular PWA Payments with Stripe Elements.

Configuring Stripe Elements in Angular
There are a couple of initial config steps to get up and running with Stripe Elements in Angular.
index.html
First, add the StripeJS v3 script tag inside the head of the document.
<head> |
typings.d.ts
Register the Stripe class with Typescript in typings.d.ts.
declare var Stripe: any; |
payment.service.ts
I am using an Angular service to instantiate the main StripeJS object. Services are a singleton in Angular and will allow us to inject the Stripe object into multiple components if needed.
ng g service payment --module app |
Now we can simply instantiate a Stripe object by passing it the publishable key (found on your Stripe dashboard).
Ideally, you should import the Stripe publishable key in the environment.ts file to manage keys between development and production.
import { Injectable } from '@angular/core'; |
Payment Request Component
Here’s a breakdown of the steps that need to happen to configure Stripe Elements payment request in an Angular component.
- Instantiate a
paymentRequestobject. - Initialize Stripe elements.
- Register an event listener that will fire when the user submits their card.
- Create a button instance with the desired theme/text.
- Mount the button asynchronously using the native HTML element.
payment-request.component.ts
Here’s how everything fits together in the component TypeScript.
Notice how I included a setTimeout inside the event listener. This is to simulate the response from your backend to charge the card - it would not be used in your actual implementation.
import { Component, AfterViewInit, Input, ViewChild } from '@angular/core'; |
payment-request.html
The HTML is nothing more than a div with a template variable for ViewChild.
<div #payElement> |
Example Usage
The component has some input properties, allowing you to attach the button to any parent component that holds the product details. Sidenote - an amount of 2300 in Stripe is equivalent to $23.00 in USD.
<payment-request |
Serving your Localhost Angular App over HTTPS
The big caveat at this point is that our site needs to be served over HTTPS for the PR button to work - and that includes development on localhost. I present you with two solutions to this issue.
Method 1 - Ngrok
Ngrok is free tool that uses SSH tunneling to serve your localhost app on an SSL domain. It is super slow, but allows you to test your Payment Request button easily.
First, download the package for your OS and follow the setup instructions. Second, add the following commands to your package.json file. Keep in mind, you need to point to the path where Ngrok is installed. On my Ubuntu machine it looks like this:
"scripts": { |
Open a terminal tab and run:
ng serve |
Then open a second tab and run:
npm run ngrok |
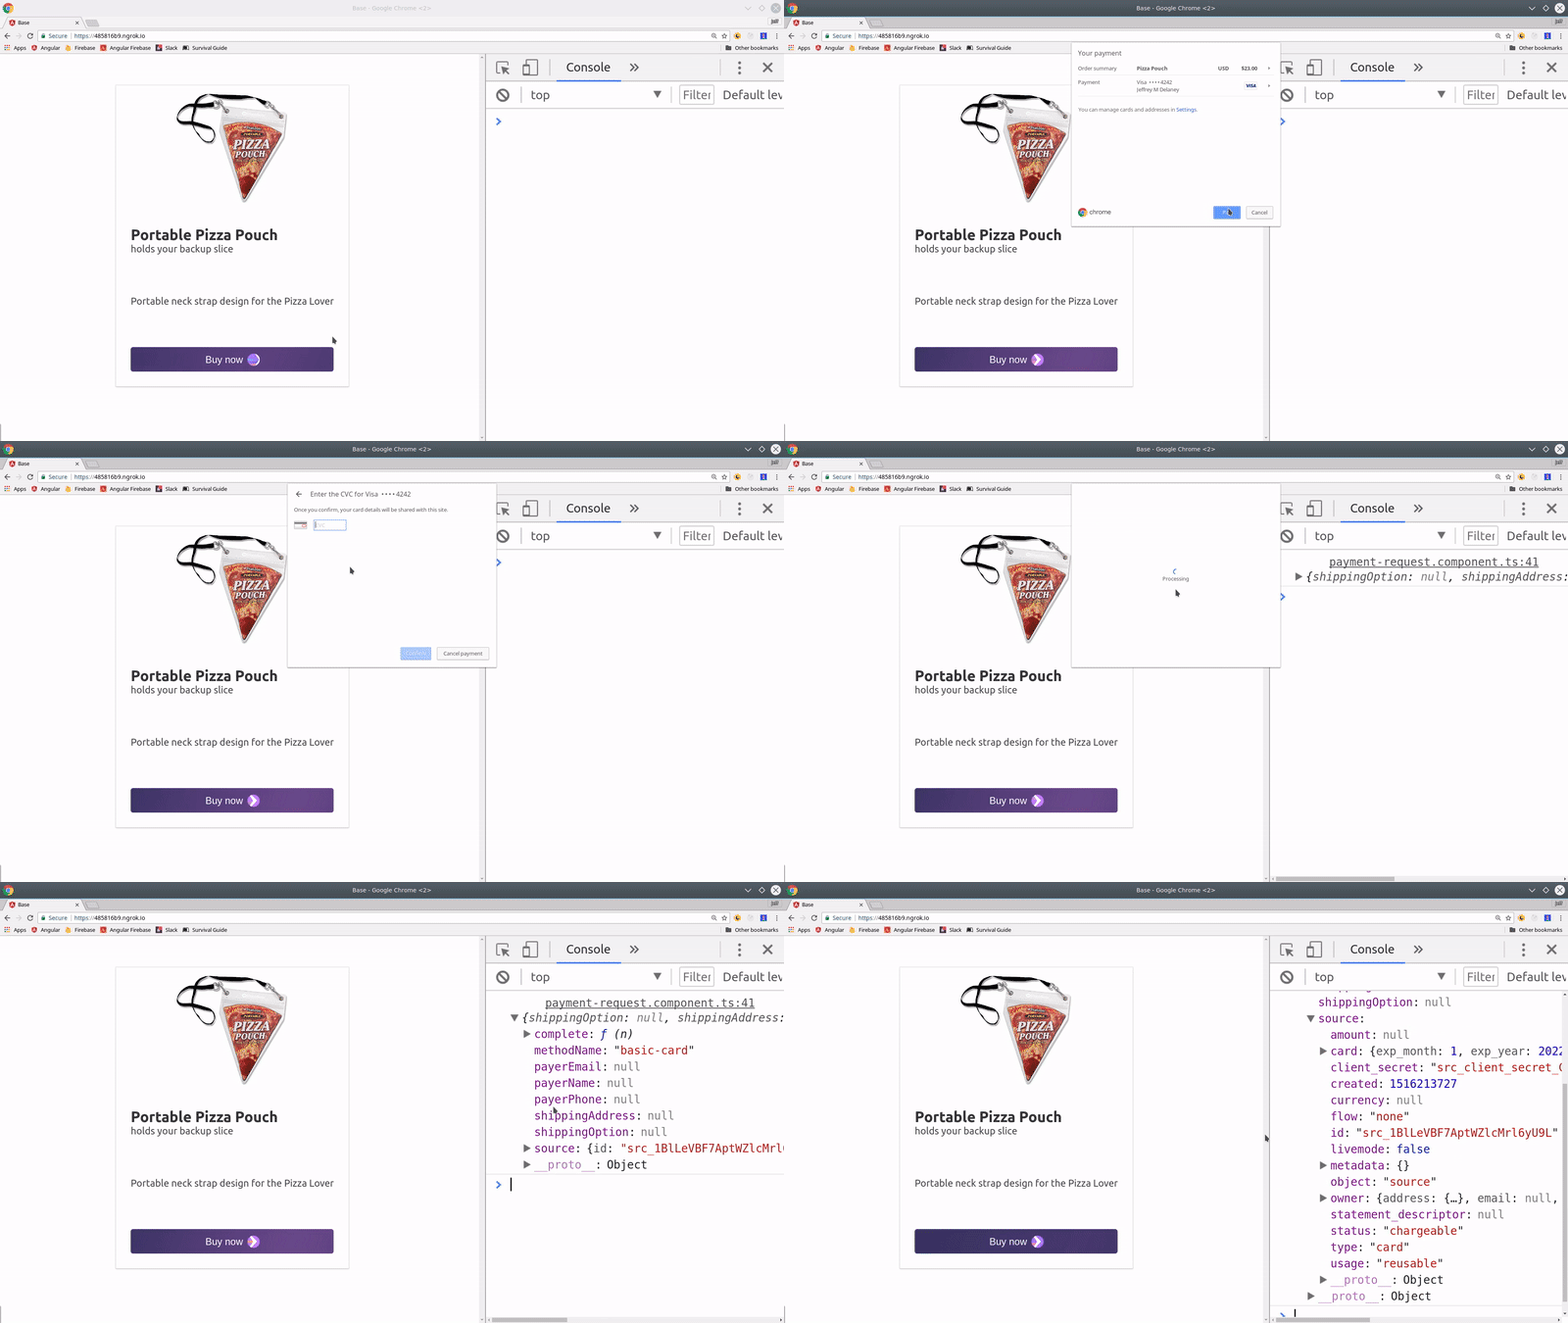
This gives you a url https://xxxxxx.ngrok.io that you can paste into the browser and your PR button should now be working.
Method 2 - SSL with the Angular CLI
If you happen have a signed SSL certificate lying around, you can use it to tell Angular to serve your site over HTTPS.
ng serve -ssl --ssl-key "your.key" --ssl-cert "your.cert" |
While it’s possible to just self-sign a certificate from the command line, Chrome will not consider it valid and your PR button will not work. In other words, if you don’t have a valid SSL, use the Ngrok method.
Wait, how do I charge the card?
Now that you have a payment source, you’re probably wondering what to do with it. You can only charge a credit card from a secure backend server. If you’re ready to take the next step, I developed a secure backend for Stripe payments using Firebase Cloud Functions accompanied by a full-length course.
The End
The Payment Request API is an exciting tool for developers building PWAs. Validating a credit card form is very tedious and difficult, so good riddance. Let me know what you think in the comments or send me a message on Slack.

