You have unlimited access as a PRO member
You are receiving a free preview of 3 lessons
Your free preview as expired - please upgrade to PRO
Contents
Recent Posts

- Object Oriented Programming With TypeScript
- Angular Elements Advanced Techniques
- TypeScript - the Basics
- The Real State of JavaScript 2018
- Cloud Scheduler for Firebase Functions
- Testing Firestore Security Rules With the Emulator
- How to Use Git and Github
- Infinite Virtual Scroll With the Angular CDK
- Build a Group Chat With Firestore
- Async Await Pro Tips
Send Push Notifications in Angular With Firebase Cloud Messaging
Episode 35 written by Jeff Delaney
UPDATE: Get the latest and greatest push messaging with Firestore lesson.
Are you looking to keep your Angular app users notified about important updates, even after they closed the app?
Push notifications are something we normally think about with native iOS and Android apps, but they can also be used in web apps with browsers supporting service workers. In this lesson, we are going to use the Firebase Cloud Messaging JS library to send notifications to users in an Angular 4 app.
Setting up Firebase Cloud Messaging (FCM) in Angular
manifest.json
We need to add a manifest.json file to our app and register it with the Angular CLI. Push Notifications use the service worker browser extension, which must be registered in this manifest.
Add the following to a new file named manifest.json to the /src directory.
Keep in mind the gcm_sender_id is the same for ALL apps in the world, so do not change it.
{ |
Then link it in the head of the index.html.
<head> |
firebase-messaging-sw.js
Push messaging requires a service worker. This allows your app to detect new messages, even after the app has been closed by the user. Create another file in the src/ directory named firebase-messaging-sw.js. The worker just hangs out in the background with the messaging config waiting to notify a user.
In production, your app must be hosted with SSL, https://yourdomain..., which is enabled by default if you deploy to Firebase hosting
importScripts('https://www.gstatic.com/firebasejs/3.9.0/firebase-app.js'); |
angular-cli.json
Lastly, we need to register these files in angular-cli.json.
"apps": [ |
Database Structure
Each user’s FCM token is saved in the fcmTokens collection. This is necessary for sending messages via Firebase Cloud Functions or any other backend for that matter. We are going to store messages for convenience in this example, but it’s not necessary to explicitly save a push notification in the database.
fcmTokens |
Building the Messaging Service
ng g service messaging |
The messaging service will obtain the user’s permission to send push notifications and listen for any incoming messages.
1. Get Permission from the User
getPermission() - All browsers/devices will ask for the user’s explicit permission to receive push messages from an app. After the user confirms, Firebase will return a token that we can reference to start sending messages.
2. Save FCM Token in Firebase
updateToken() - Whenever you send messages to a user you must reference this token, so we are going to save it in the firebase database database. This token can change for a variety of reasons, such as clearing the browser cache, so we need to update
3. Listen for for Messages
receiveMessage() - Now we just need to listen for new messages on the frontend. When a new message is received, it will push it’s value to the BehaviorSubject so we can treat it as an Obserable.
import { Injectable } from '@angular/core'; |
Showing Notifications

1. When the app is active
When the app is active, we want to display messages in the app itself. It would be distracting to get push notifications while you’re actively working in an app. I’m going to do this in the app component, but you could add this to your own component designed specifically for managing push notification preferences.
import { Component, OnInit } from '@angular/core'; |
In the HTML, you can simply unwrap the BehaviorSubject with the async pipe.
{{ message | async | json }} |
2. When the app is closed
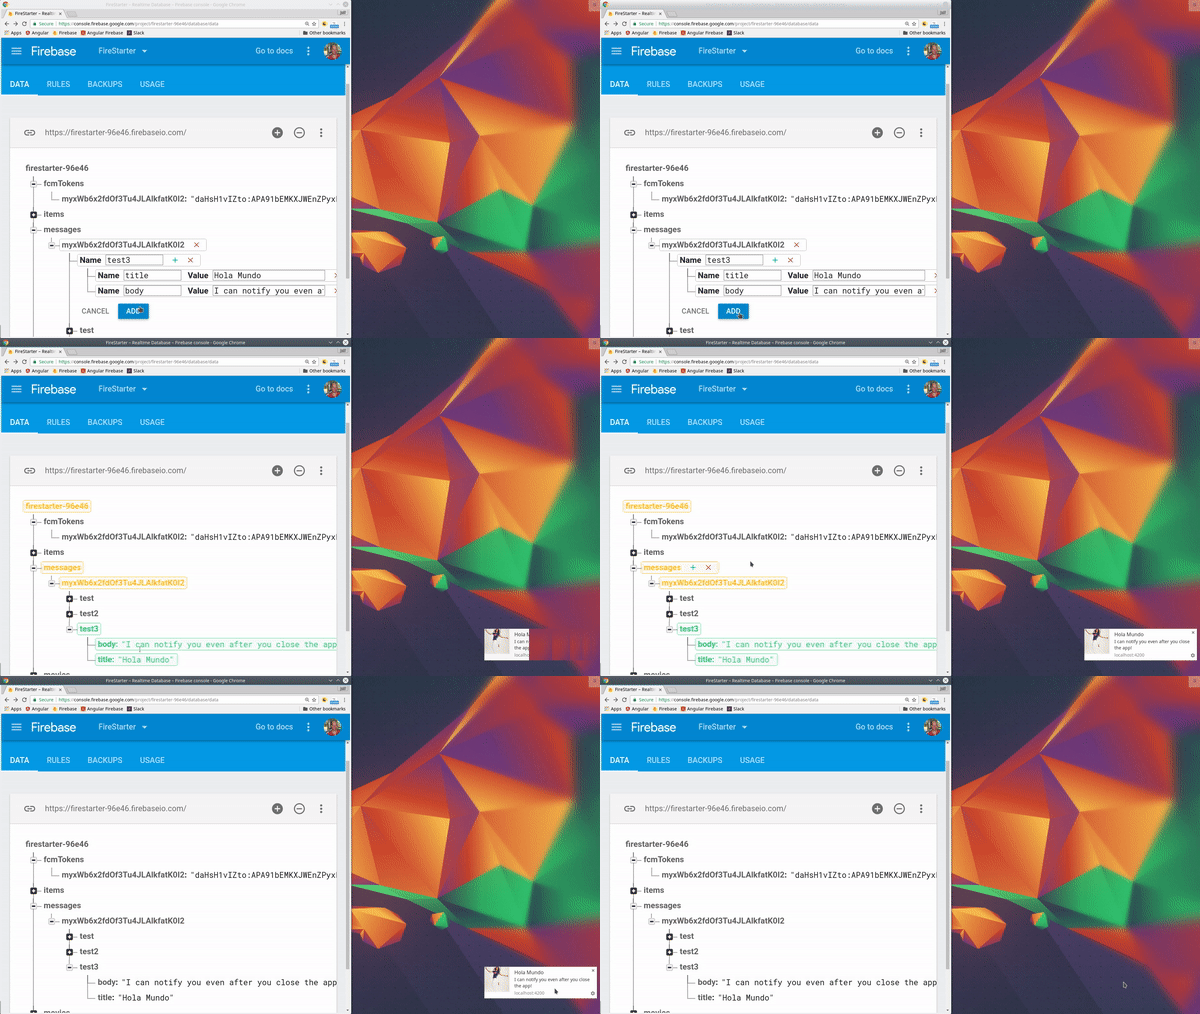
The cool thing about FCM is that we can continue engaging users even after then have closed the app. Guess what… that service worker you created is already handing everything. In the next section we will send messages and they will automatically appear even if the app is closed.

Sending Messages
Now that we have the FCM token saved in Firebase, we need to decide how to send notifications to users. In most cases, you will probably want to trigger it when something changes in the database. For example, a user gets a new comment on their blog post.
Send Message via HTTP
You can also trigger messages over HTTP or the command line. Here’s what a curl request will look like:
curl https://fcm.googleapis.com/fcm/send \ |
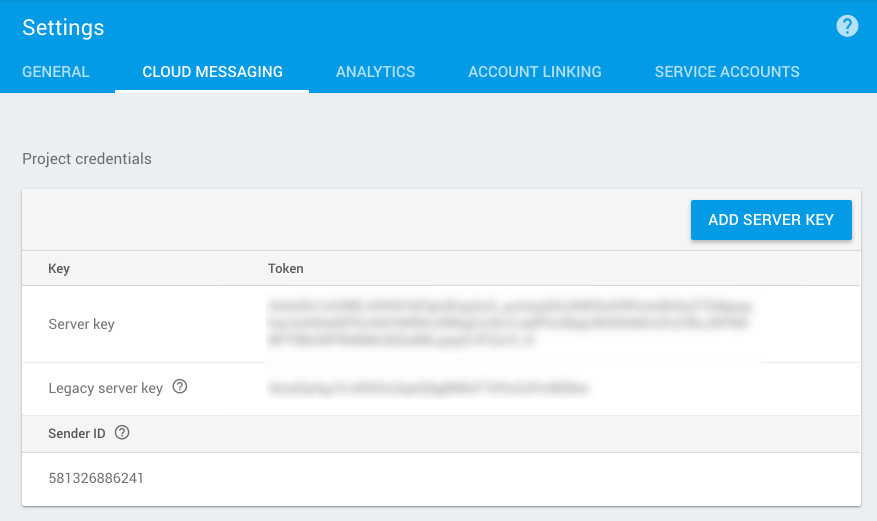
You need to user the Server Key from Firebase (not the main API key), see the screenshot below

Send Message via Firebase Cloud Functions
Most situations will use Firebase Cloud Functions to send push messages. For example, Slack sends push messages when you are mentioned in a conversation, or YouTube sends a message when your video has a new comment. Here’s how to setup database triggers to send push messages.
index.js
We trigger the function whenever a new message is created in the database using the onCreate() trigger. The cloud function will first pull the FCM token that we saved in the database, then use the message data to create the payload that will be send to the end user.
Keep in mind, you don’t need to save messages to the database like we are doing here. You can create push messages dynamically based on the underlying data.
const functions = require('firebase-functions'); |
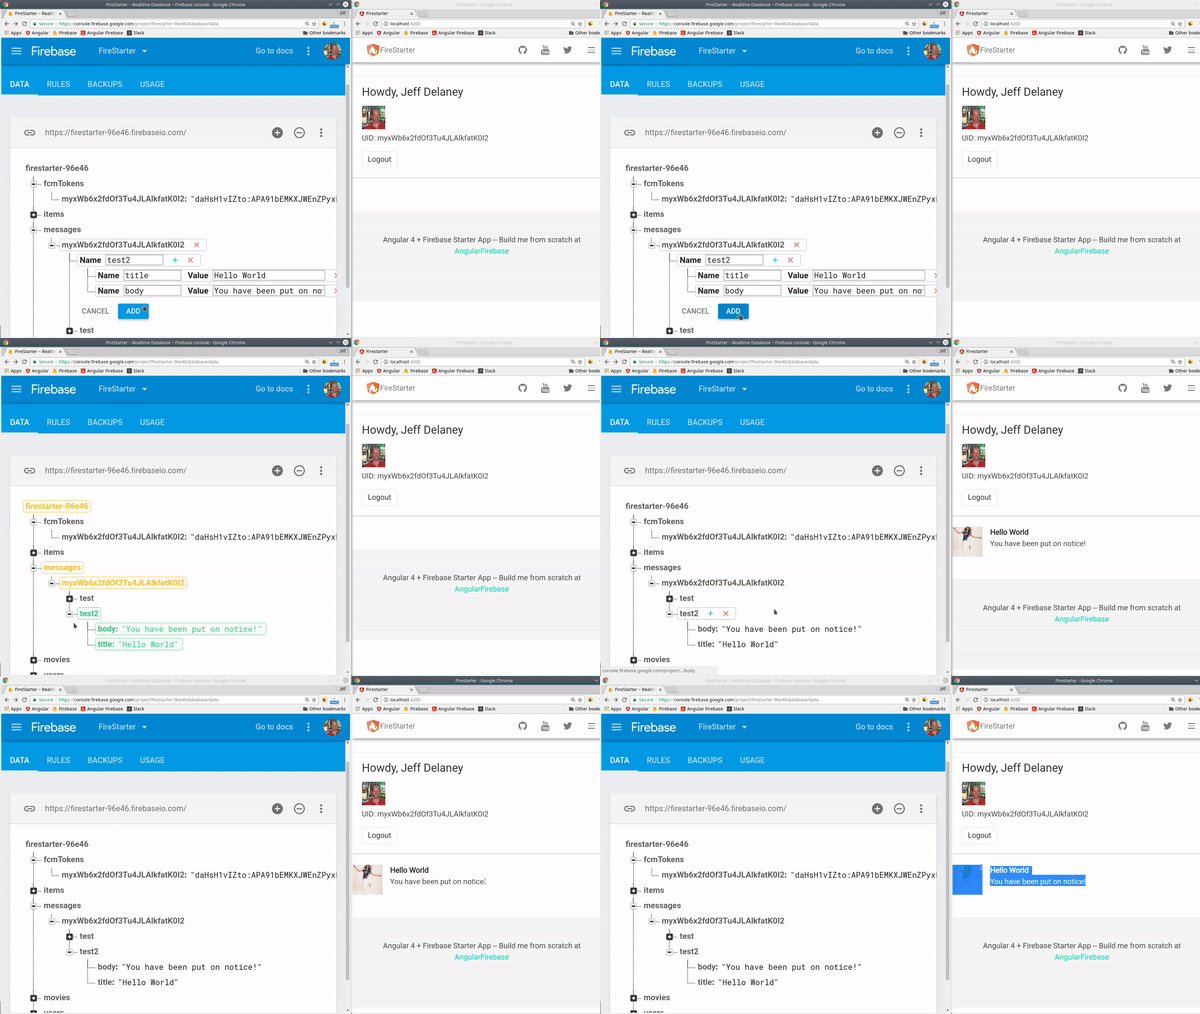
Now deploy your function and give it a whirl!
firebase deploy --only functions |
That’s it for Firebase Push Messaging. Let me know what you think in the comments.

