Search Lessons, Code Snippets, and Videos
search by algolia
X
#native_cta# #native_desc# Sponsored by #native_company#

AngularFire2 State Changes With NgRx

Episode 70 written by Jeff Delaney
full courses and content on fireship.io

Today I will show you how to use the stateChanges() method in AngularFire2 to obtain fine-grained control over observable data changes in your NgRx Firebase app.

When and why would I use AngularFire2 StateChanges?

Great question. Imagine you want react differently based on the type of change occurs. For example, you want to flash a green success notification when an item is created, a red danger notification when an item is removed, and a yellow warning notification when an item is modified.

Remind you of anything? That’s exactly how the Firestore web console works, which just so happens to be built with NgRx.

In this demo, I have a collection of pizzas and the restaruant manager wants to keep track of when a pizza is cooking or delivered. We will use NgRx effects to subscribe to stateChanges on a Firestore collection. When a change occurs, our app can react based on whether the object was added, modified, and removed.

Thank you to Booth Group for inspiring me to create this content.
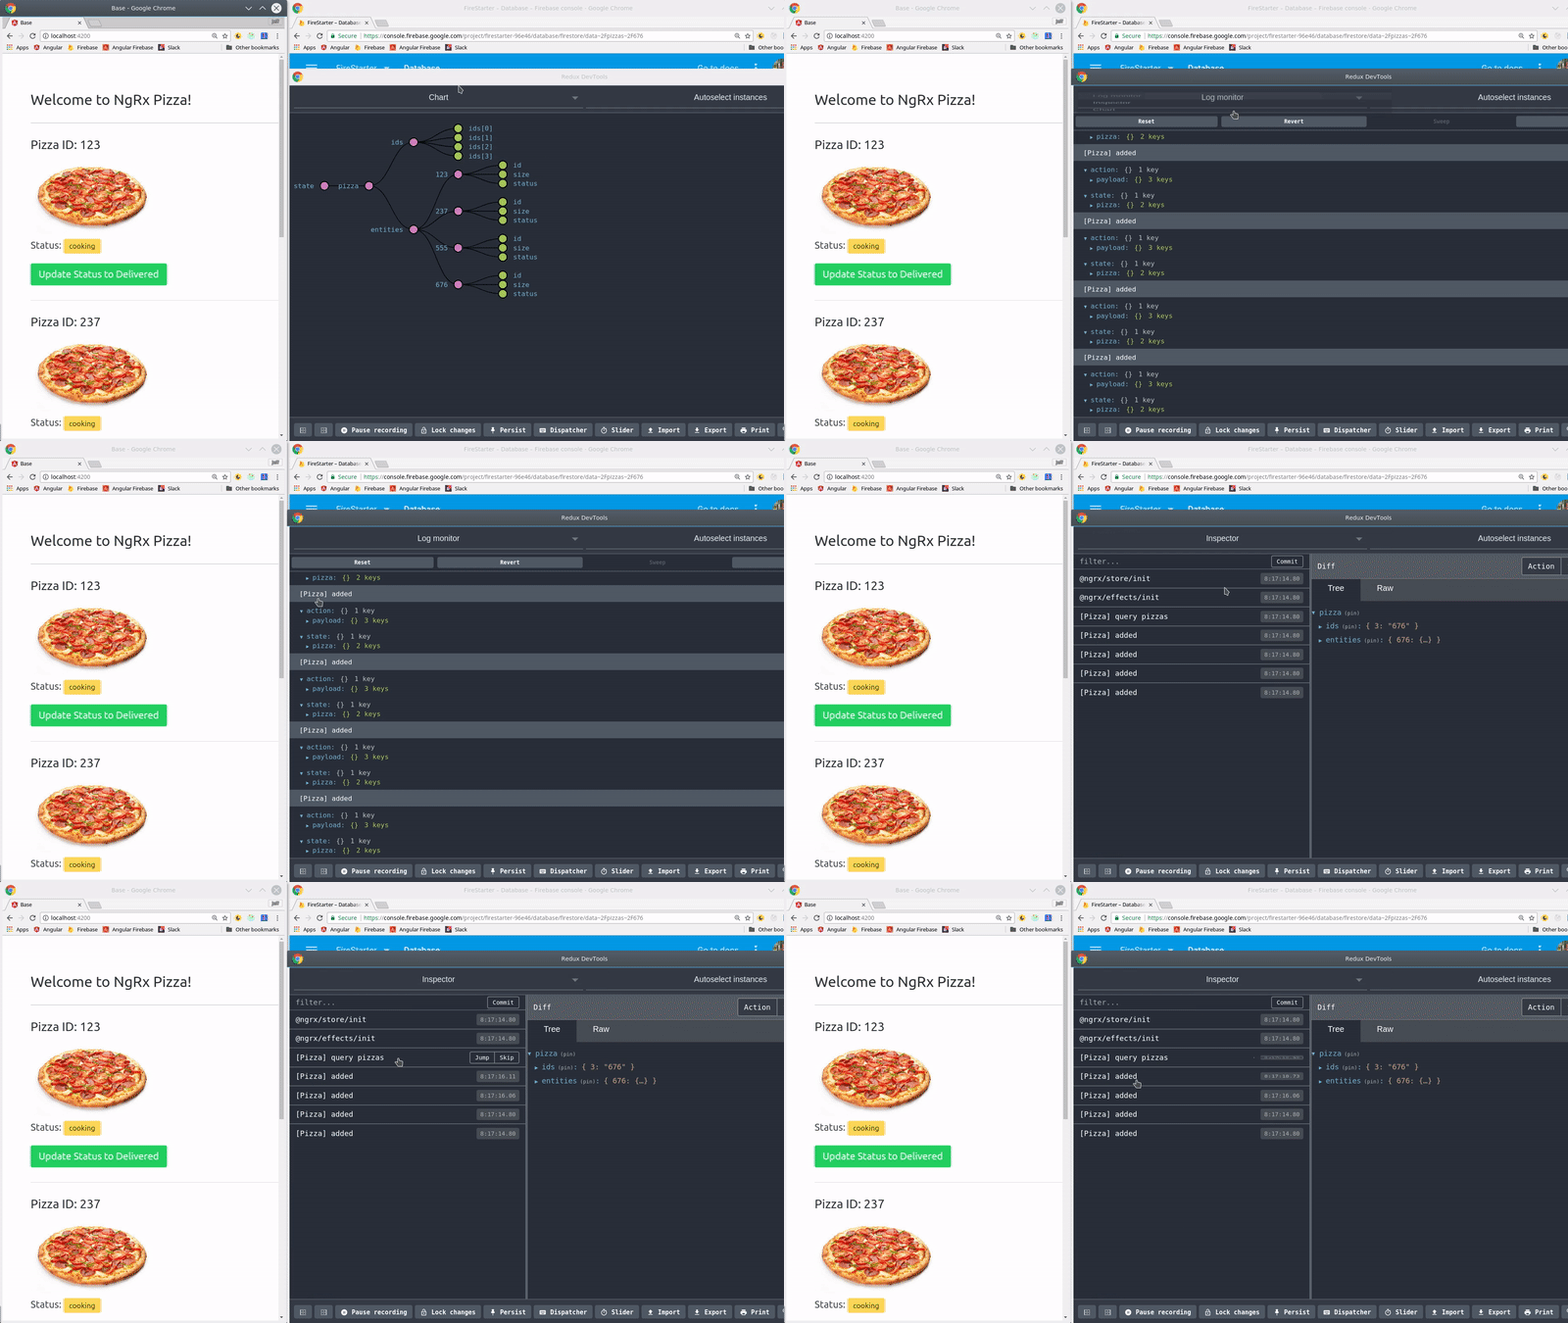
using angularfire statechanges with ngrx

Initial NgRx and AngularFire2 Setup

I am starting with a brand new Angular 5 app, with it’s only dependencies being the NgRx packages and AngularFire2.

If you haven’t already seen my Ngrx Entity Lesson, I highly recommended you go through that first. It will teach you about the entity adapter methods and provide a more in-depth overview of the initial setup.

You must have a Firebase Account and AngularFire2 installed to follow this lesson, please follow the official setup instructions.

Get the full source code for ngrx firestore on Github.

App Module

Make sure you have the necessary NgRx packages installed.

npm install @ngrx/{store,entity,effects,store-devtools} --save

My final app module looks like this.

@NgModule({
declarations: [
AppComponent,
],
imports: [
BrowserModule,
AppRoutingModule,
StoreModule.forRoot(reducers),
StoreDevtoolsModule.instrument({
maxAge: 25
}),
EffectsModule.forRoot([]),
AngularFireModule.initializeApp(environment.firebaseConfig),
AngularFirestoreModule,
PizzaModule,
],
providers: [],
bootstrap: [AppComponent]
})
export class AppModule { }

Reducers

I am bundling all of my reducers into a /app/reducers/index.ts. This is not very useful in this tutorial, but it is a good practice as your app grows.

import { ActionReducerMap } from '@ngrx/store';
import { pizzaReducer } from '../pizza/pizza.reducer';

export const reducers: ActionReducerMap<any> = {
pizza: pizzaReducer
};

Pizza Feature Module

I highly recommed building feature modules when working with NgRx. Without well-organized features, your app is will quickly spiral out of control.
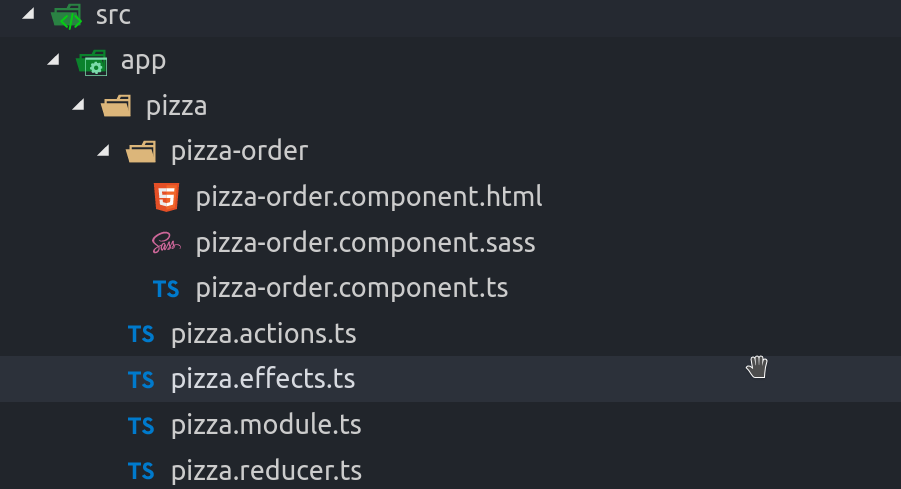
file structure for our ngrx pizza feature

// pizza.module
// ...omitted see github source
import { PizzaEffects } from './pizza.effects'

@NgModule({
imports: [
CommonModule,
StoreModule.forFeature('pizza', pizzaReducer),
EffectsModule.forFeature([PizzaEffects])
],
exports: [PizzaOrderComponent],
declarations: [PizzaOrderComponent]
})
export class PizzaModule { }

Actions

The action names are very important here. AngularFire2 will provde three different action types in the returned snapshot - added, modified, and removed. Your action string should match exactly, i.e '[Pizza] modified'. Here are my notes about these actions.

  1. The initial query will request data from Firestore. You might also add a payload to it modify the query parameters
  2. After the query, we listen for stateChanges to emit added, modified, or removed.
  3. The update and success action is used to trigger an update to Firestore,

pizza.actions.ts

import { Action } from '@ngrx/store';
import { Pizza } from './pizza.reducer';

export const QUERY = '[Pizza] query pizzas';

export const ADDED = '[Pizza] added';
export const MODIFIED = '[Pizza] modified';
export const REMOVED = '[Pizza] removed';

export const UPDATE = '[Pizza] update';
export const SUCCESS = '[Pizza] update success';

// Initial query
export class Query implements Action {
readonly type = QUERY;
constructor() {}
}

// AngularFire2 StateChanges
export class Added implements Action {
readonly type = ADDED;
constructor(public payload: Pizza) {}
}

export class Modified implements Action {
readonly type = MODIFIED;
constructor(public payload: Pizza) {}
}

export class Removed implements Action {
readonly type = REMOVED;
constructor(public payload: Pizza) {}
}


// Run a Firestore Update
export class Update implements Action {
readonly type = UPDATE;
constructor(
public id: string,
public changes: Partial<Pizza>,
) { }
}

export class Success implements Action {
readonly type = SUCCESS;
constructor() {}
}

export type PizzaActions =
Query |
Added |
Modified |
Removed |
Update |
Success;

Reducer

The reducer contains the pizza interface, as well as the reducer function and entity selectors.

Most of this code is idential to my past NgRx entity lesson, except the reducer function combines the actions from AngularFire2 with the entity methods.

  • Adapter - Action
  • addOne - added
  • updateOne - modified
  • removeOne - removed

They work together Mario and Luigi.

pizza.reducer.ts

import * as actions from './pizza.actions';
import { EntityState, createEntityAdapter } from '@ngrx/entity';
import { createFeatureSelector } from '@ngrx/store';

// Main data interface

export interface Pizza {
id: string;
size: string;
status: string; // cooking or delivered
}

// Entity adapter
export const pizzaAdapter = createEntityAdapter<Pizza>();
export interface State extends EntityState<Pizza> { }


export const initialState: State = pizzaAdapter.getInitialState();

// Reducer

export function pizzaReducer(
state: State = initialState,
action: actions.PizzaActions) {

switch (action.type) {

case actions.ADDED:
return pizzaAdapter.addOne(action.payload, state)

case actions.MODIFIED:
return pizzaAdapter.updateOne({
id: action.payload.id,
changes: action.payload
}, state)

case actions.REMOVED:
return pizzaAdapter.removeOne(action.payload.id, state)

default:
return state;
}

}

// Create the default selectors

export const getPizzaState = createFeatureSelector<State>('pizza');

export const {
selectIds,
selectEntities,
selectAll,
selectTotal,
} = pizzaAdapter.getSelectors(getPizzaState);

Effects

The stateChanges() magic happens in the first query effect. It works by mapping the snapshot down to its data, then dispatches a different action based on the type returned by AngularFire2.

We are also going to take advantage of lettable RxJS operators, which were introduced in v5.5. Ngrx effects code can be nortoriously verbose, but lettable operators help keep your code readable.

pizza.effects.ts

import { Injectable } from '@angular/core';
import { Observable } from 'rxjs/Observable';
import { Action } from '@ngrx/store';
import { Actions, Effect } from '@ngrx/effects';

import { Pizza } from './pizza.reducer';
import * as pizzaActions from './pizza.actions';

import { AngularFirestore, AngularFirestoreCollection } from 'angularfire2/firestore';

import { switchMap, mergeMap, map } from 'rxjs/operators';

@Injectable()
export class PizzaEffects {


@Effect()
query$: Observable<Action> = this.actions$.ofType(pizzaActions.QUERY).pipe(
switchMap(action => {
console.log(action)
return this.afs.collection<Pizza>('pizzas', ref => ref.where('status', '==', 'cooking')).stateChanges()
}),
mergeMap(actions => actions),
map(action => {
return {
type: `[Pizza] ${action.type}`,
payload: { id: action.payload.doc.id, ...action.payload.doc.data() }
};
})
);


@Effect()
update$: Observable<Action> = this.actions$.ofType(pizzaActions.UPDATE).pipe(
map((action: pizzaActions.Update) => action),
switchMap(data => {
const ref = this.afs.doc<Pizza>(`pizzas/${data.id}`)
return Observable.fromPromise( ref.update(data.changes) )
}),
map(() => new pizzaActions.Success())
)

constructor(private actions$: Actions, private afs: AngularFirestore) { }
}

Component

The component is very simple. We run the query during ngOnInit, then provide a button for the user to update the stats.

pizza-order.component.ts

import { Component, OnInit } from '@angular/core';
import { Store } from '@ngrx/store';
import { Observable } from 'rxjs/Observable';
import * as actions from '../pizza.actions';
import * as fromPizza from '../pizza.reducer';

@Component({
selector: 'pizza-order',
templateUrl: './pizza-order.component.html',
styleUrls: ['./pizza-order.component.sass']
})
export class PizzaOrderComponent implements OnInit {

pizzas: Observable<any>;

constructor(private store: Store<fromPizza.State>) { }

ngOnInit() {
this.pizzas = this.store.select(fromPizza.selectAll)
this.store.dispatch( new actions.Query() )
}


updatePizza(id, status) {
this.store.dispatch( new actions.Update(id, { status }) )
}

}

pizza-order.component.html

The HTML is just basic Angular looping and event handling.

<div *ngFor="let pizza of pizzas | async">

<h4>Pizza ID: {{ pizza.id }} </h4>

<p>{{ pizza.status }}</p>

<button (click)="updatePizza(pizza.id, 'delivered')">
Update Status to Delivered
</button>

</div>

The End

That’s it for Ngrx Firestore. You now have a reliable way to manage both a local ngrx store and a persistent backend in Firestore.